CapCut does double-duty. It’s just as useful for basic cuts as it is for adding cool stuff like text, filters, or music. Many small business owners and digital agencies use CapCut because it’s fast and user-friendly.
It saves time and keeps the cost down. Learning to edit with CapCut gives anyone the power to control their brand stories. The following explains step-by-step how it functions.
Understanding the CapCut Interface
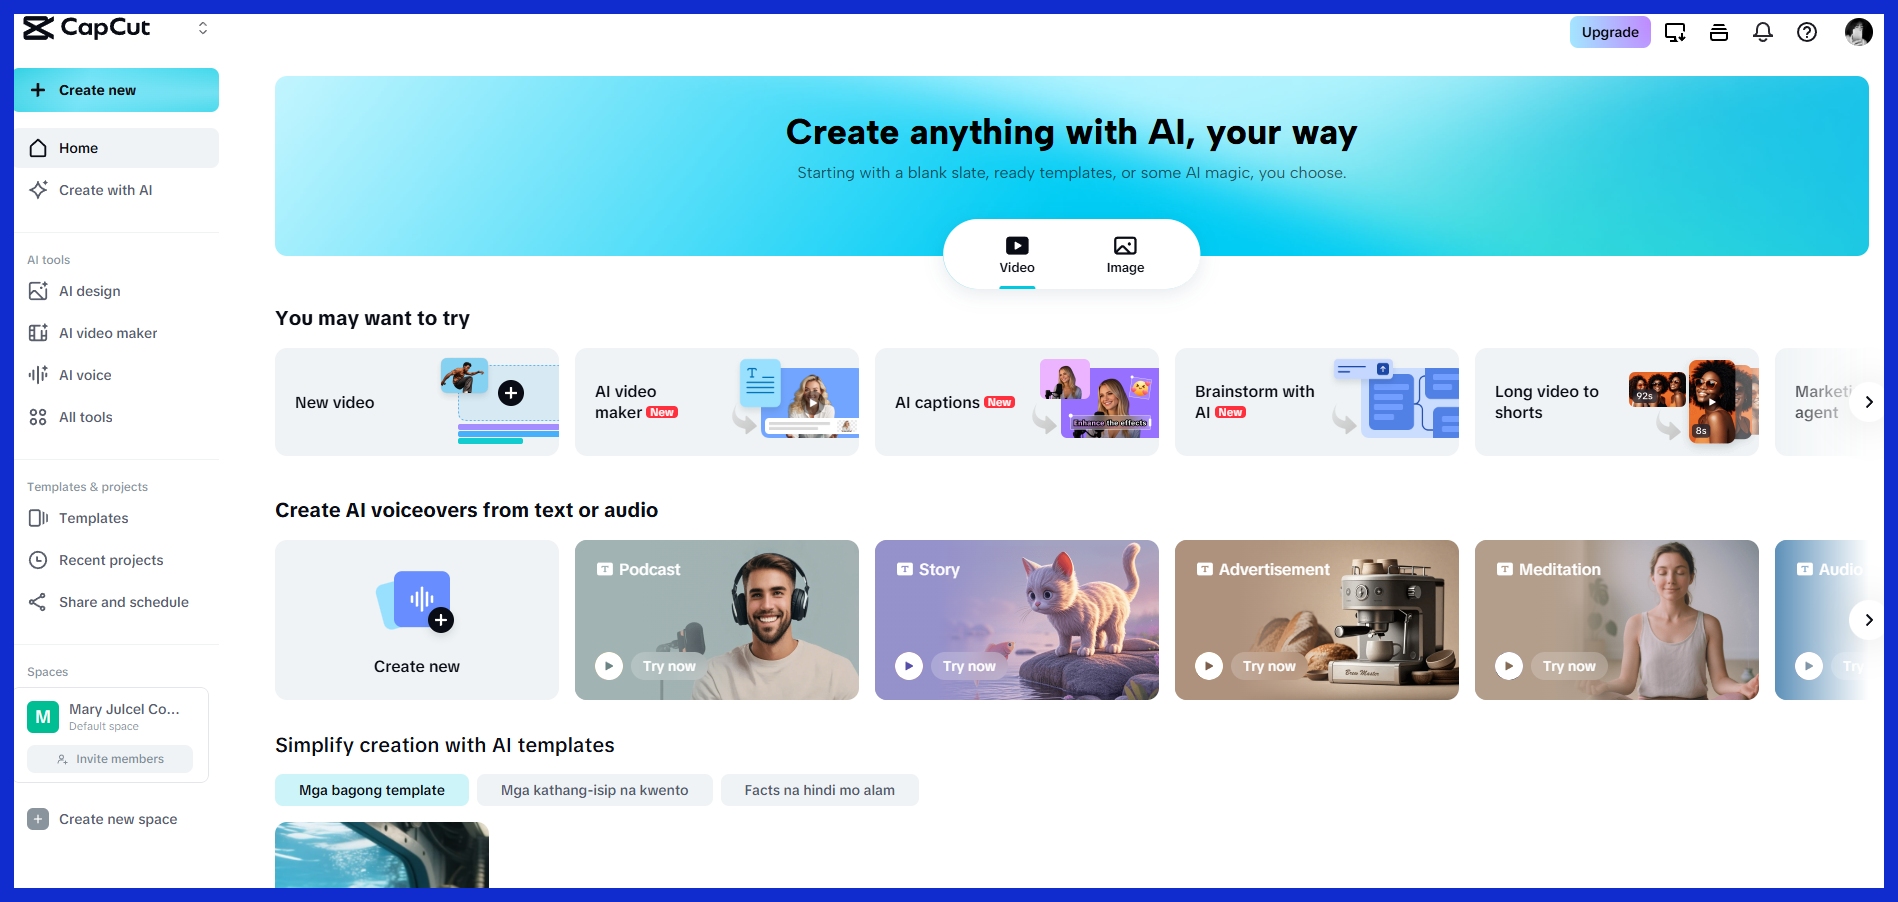
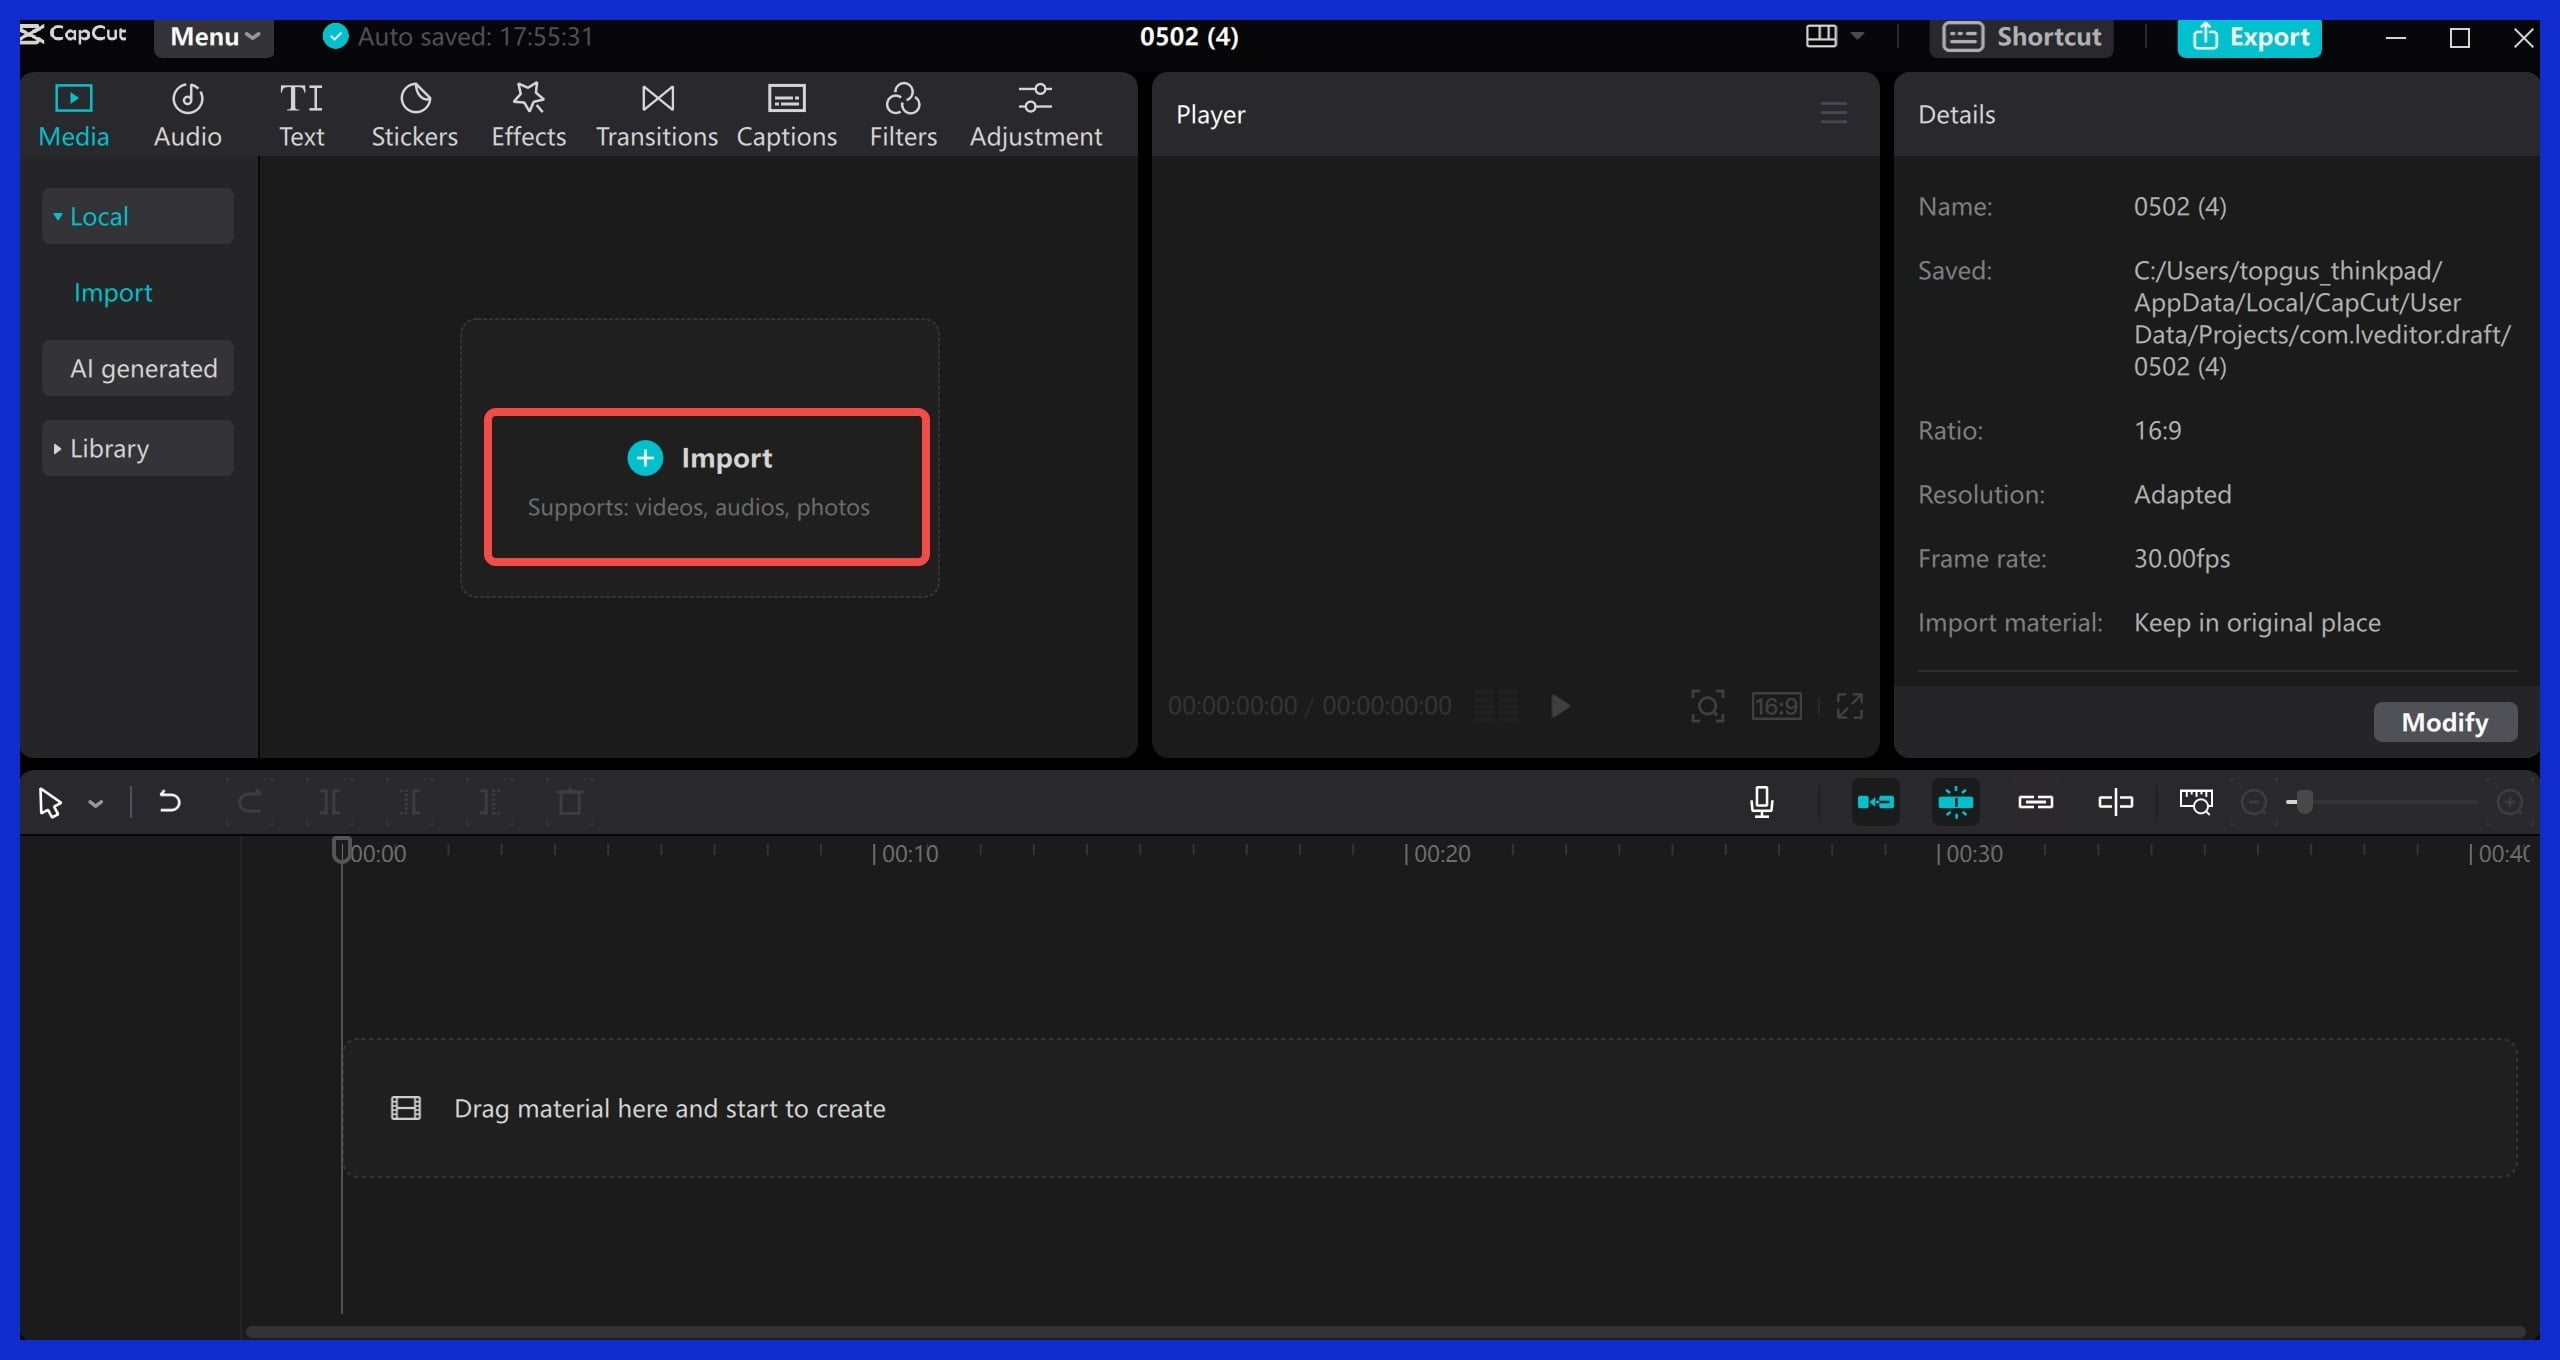
CapCut works across desktop, mobile, and web, so wherever you are, you get a familiar editing canvas. It has a neat, intuitive interface that allows users to quickly start projects. Once you’ve uploaded files, be it video, audio, or images, through the “New video” or “Create project” button, all your essential tools are immediately in front of you.
You’ll notice a timeline at the bottom, a media panel to the left, a preview window up top, and a handy toolbar with core features. This configuration is brilliant for business promo video creators, digital agencies overseeing social posts, or anyone else requiring quick, dependable edits without the learning curve.
The Timeline
The timeline is where your story takes shape. You drop in your video and audio clips, pile them up in your desired sequence, and trim each one by dragging the edges to adjust timing. This comes in handy for nailing transitions or syncing audio to visual.
Looking to overlay a logo or text? Just layer it straight over your primary footage. For advanced projects, say a marketing campaign reel, you can add tracks for graphics, effects, or background sound. Zoom in and out of the timeline to edit small details, such as trimming a word from a voice-over or synchronizing a transition to music.
Even if you’re new, the drag-and-drop interface makes it almost too simple.
The Media Panel
CapCut allows you to import an extensive collection of file formats. See the table below for what is supported:
|
Media Type |
Supported Formats |
|---|---|
|
Video |
MP4, MOV, AVI, MKV |
|
Audio |
MP3, WAV, AAC |
|
Image |
JPG, PNG, BMP, GIF |
Group your assets into folders so you’re not searching for that one clip in a list of twenty. Preview clips directly in the panel before placing them into the timeline, eliminating guesswork and saving time.
A search bar allows you to enter a file name or keyword, and CapCut locates it immediately.
The Preview Window
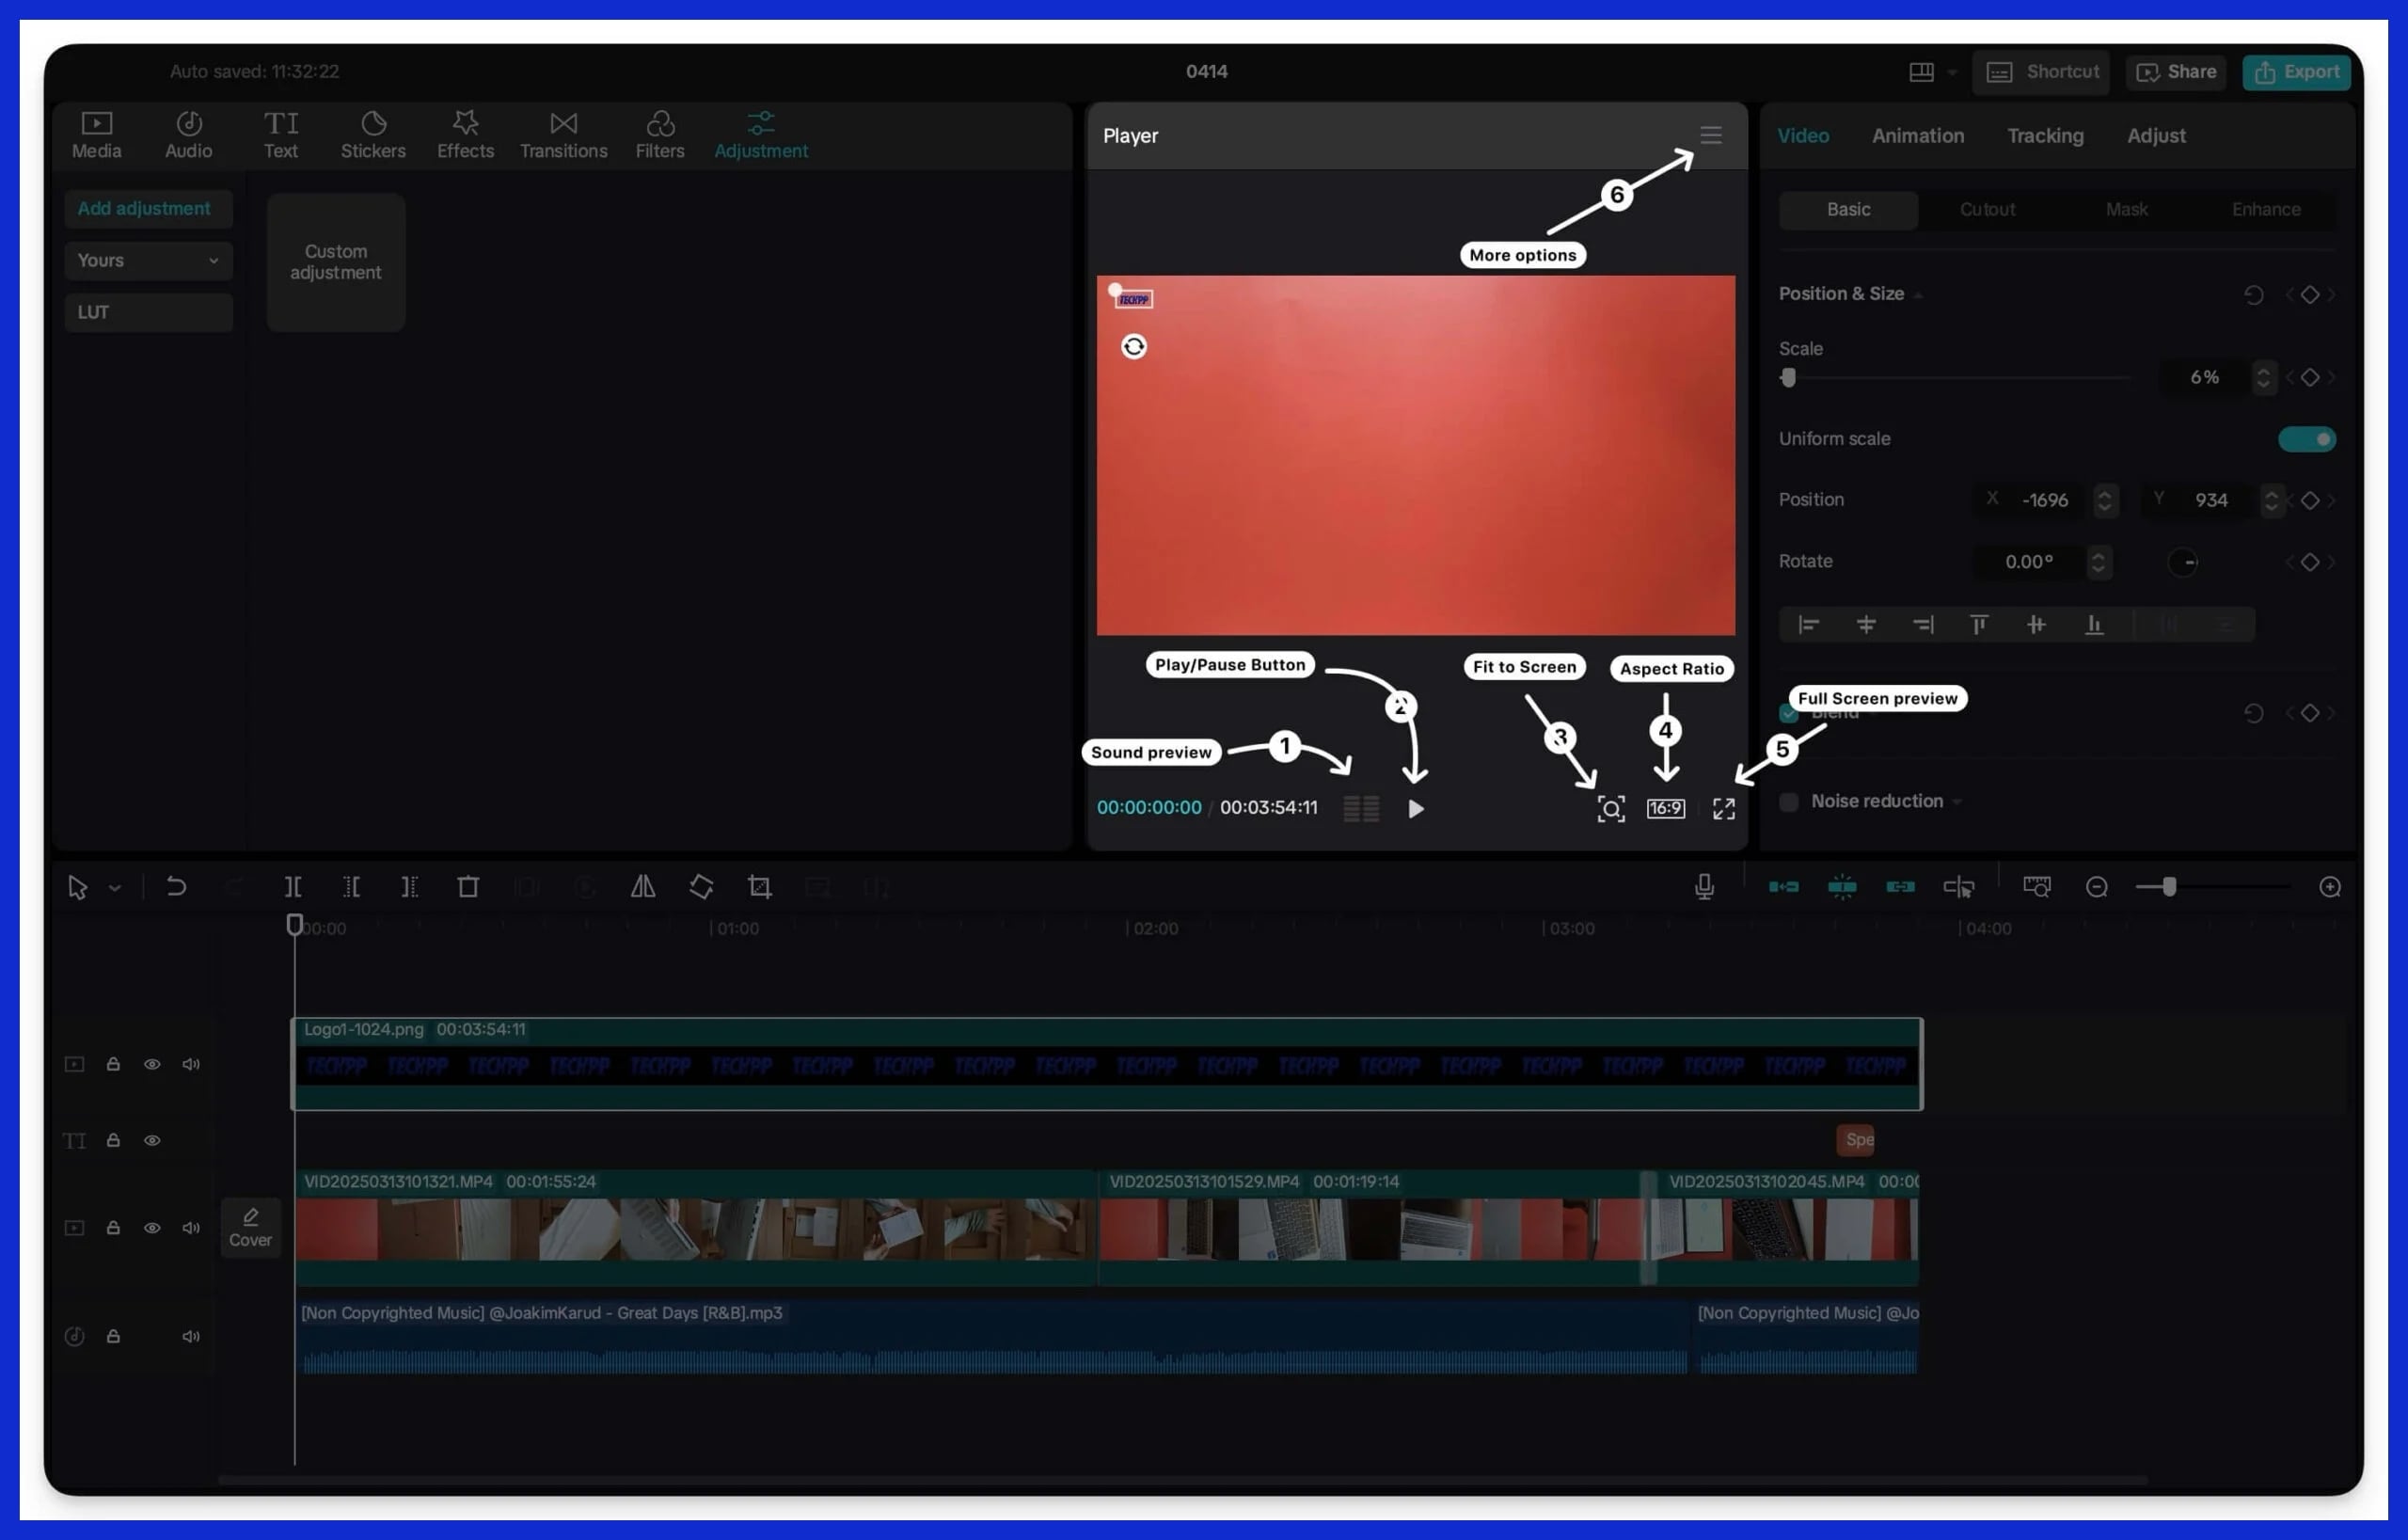
The preview window is your real-time feedback loop. As you adjust your timeline, you view every modification immediately, no export necessary. Slow down playback to see if a transition looks smooth, or go into full-screen mode to catch small errors.
This counts for agencies or creators needing sleek output without countless edits. If something looks off, a color, a jump cut, a missed caption, make a note and fix it before exporting.
The Toolbar
The toolbar is where you get your essential tools. Cut, copy, paste, and undo are all a click away. Need a filter to fit your brand? It’s right there, along with text, elements, and AI-powered tools like auto-captions.
You can even tap to split a scene. Shift or conceal tools you rarely use to maintain a clean workspace. If you’re time-strapped or just want pro-grade graphics, check out sites like Graphically.io, which provide unlimited graphic design assistance that is perfect for agencies managing numerous projects and deadlines.
Your First CapCut Video Edit
Well, it all begins with editing your first video in CapCut. A workflow or system-based approach helps you save time and obtain better results when you need to wow clients or grow your agency’s content. CapCut simplifies the initial steps, yet understanding the process truly matters.
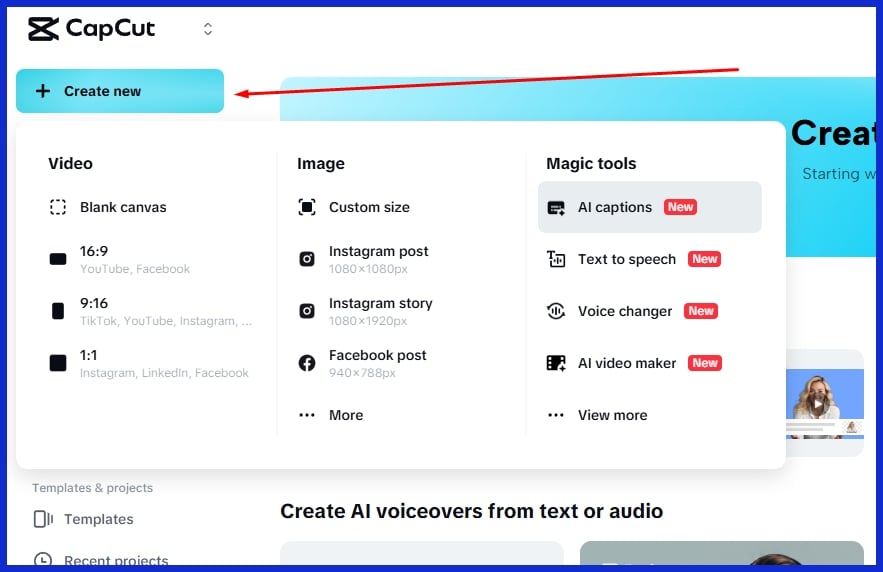
Download the app, give it access to your camera roll, and you arrive in the main workspace. Here’s a quick step-by-step outline:
-
Download and install CapCut on your device.
-
Grant camera roll access for easier media import.
-
Import video, audio, and image files.
-
Arrange your media on the timeline.
-
Trim, split, and organize clips as needed.
-
Add transitions, text, and effects.
-
Incorporate background music or voiceover.
-
Preview your edit and tweak settings.
-
Save your project often.
-
Export your final video in high resolution, 1080p or higher.
1. Importing Media

Click the import button on the CapCut canvas. Choose multiple video and audio files at once. It reduces setup time if you’re on a deadline! Once files are in, group them—video, images, audio. This simplifies snagging later what you need.
Verify file types. CapCut does best with familiar ones like MP4 video and MP3 audio. If you encounter problems, make sure to convert files prior to importing.
2. Trimming Clips
Select a clip on your timeline, then pull its edge to trim out what you don’t want. Take long video bites and cut them apart using the split tool. That way you can cut to the good parts quickly.
Play every snipped piece once you cut to ensure it’s the desired length—scared to undo if you trim too much. When you’re happy, line up your best cuts to form the story.
3. Adding Transitions

Flip through CapCut’s transitions. You’ll find styles such as fade, slide, or zoom. Drag one in between two clips in the timeline. If you want it slower or faster, change the duration with a slider.
Stir up a few transitions throughout your project to engage your viewers, but don’t go crazy. Too many effects can draw attention away from your point.
4. Incorporating Audio
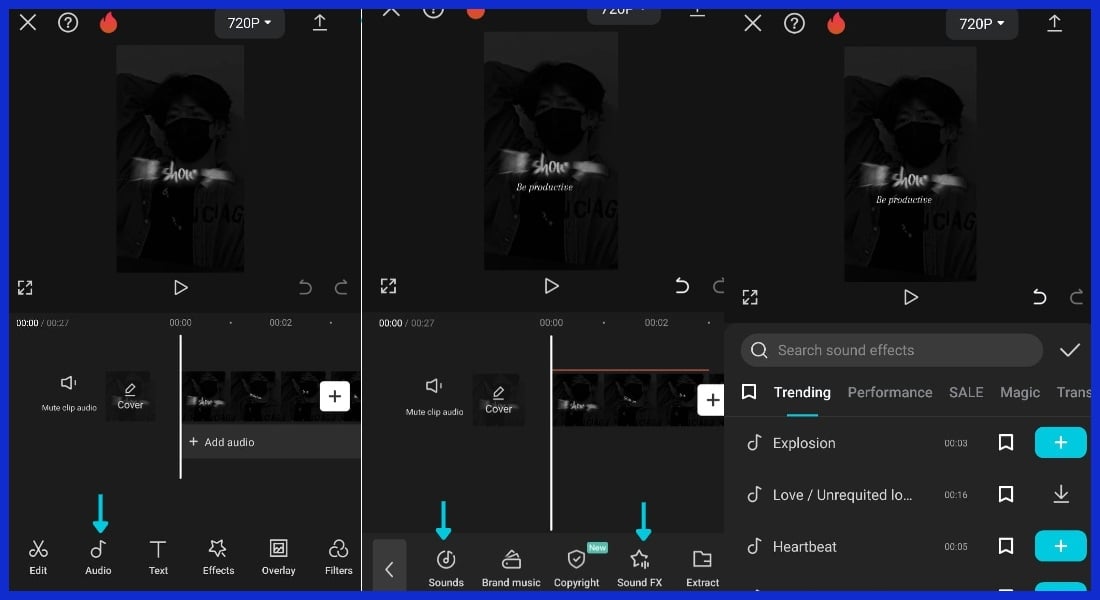
Add music, sound effects, or voiceovers. Background music gives it a feel and sound effects emphasize important moments. Equalize so your music doesn’t drown voices.
If you want to add your own voice, tap record in the app. Align your voiceover with the visuals. CapCut allows you to edit audio speed and fade in or out for seamless transitions.
Graphically.io likes to recommend matching music style to the video’s message for greater impact.
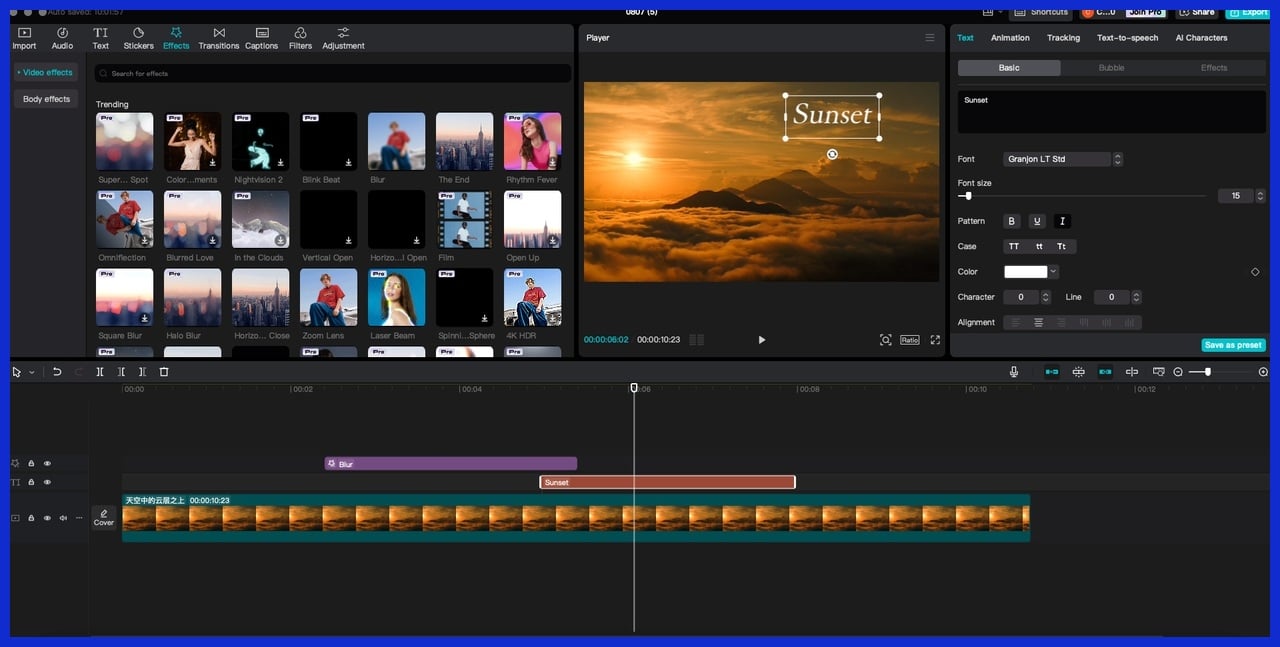
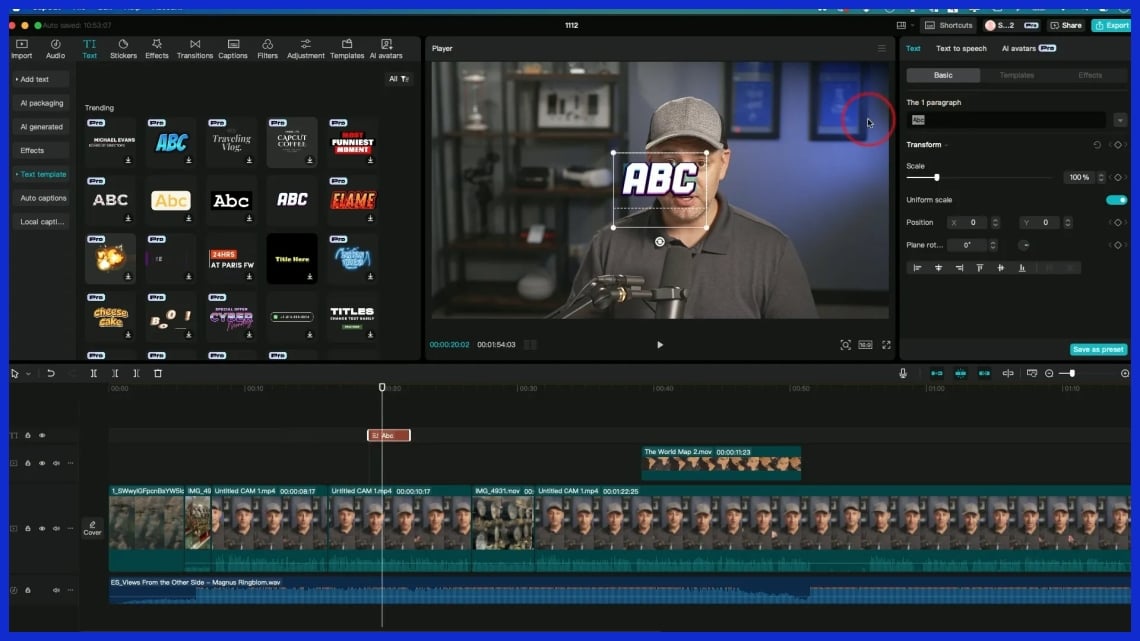
5. Applying Text
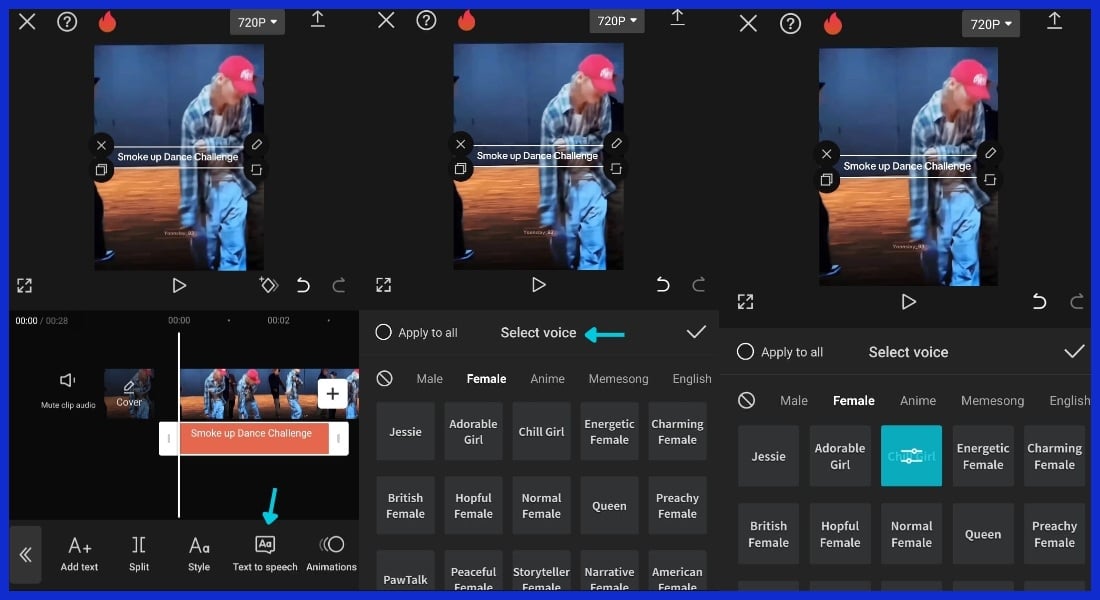
Choose a text template or begin with a blank. Add titles, captions, or credits and drag them wherever you want on screen. Modify the font, size, and color to suit your style.
Go wild with animations, such as typewriter or fade-in text that really make it pop. Templates are time-saving and still sharp-looking, which is great for scrunched project turnarounds.
Need something tailored? Graphically.io design assets can make your video stand out even more!
Elevate with Advanced Techniques
It’s advanced editing that transforms your typical video into something that captivates and engages. CapCut is bursting with features designed for those seeking to do much more than a trim and a cut. With these tools, you can sculpt your clips to pop.
Practice consistently, with a dash of play — the recipe for skill acquisition. Here are some of the best ways to improve your CapCut projects:
-
Experiment with speed curve editing to shift the tempo of your footage. This enables you to insert slow motion or speed ramps and enhances the drama of action sequences.
-
Chroma key (green screen) is used to insert new backgrounds or effects. This is convenient for product demos and imaginative storytelling.
-
Export videos in 1080p or higher and at 30 or 60 fps for the smoothest appearance.
-
Start with premium clips. Even fancy tricks won’t save poor footage.
-
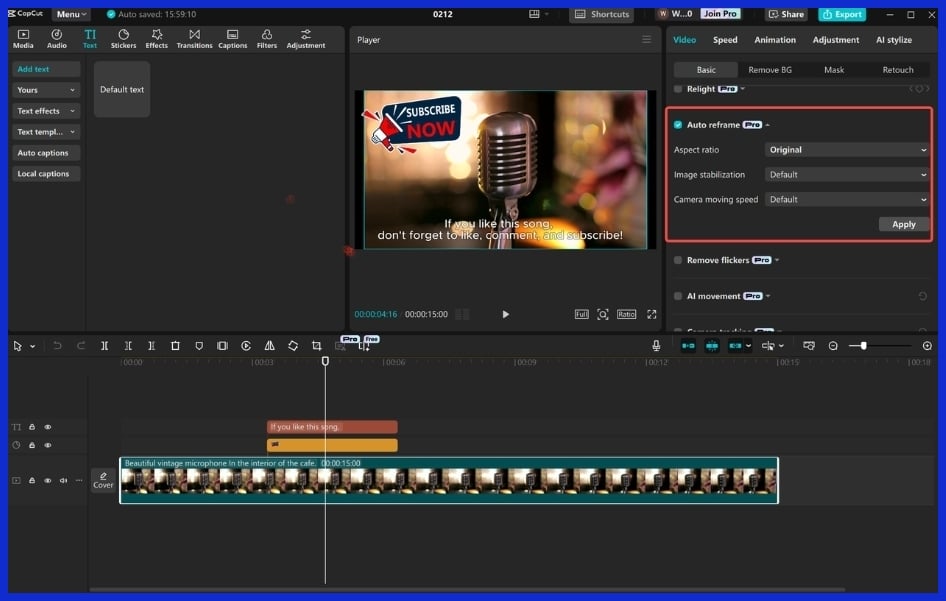
Sprinkle in camera tracking when you want your graphics or text to follow along with something on screen.
-
View online tutorials and edits from creators you admire to break down fresh ideas.
Keyframe Animation
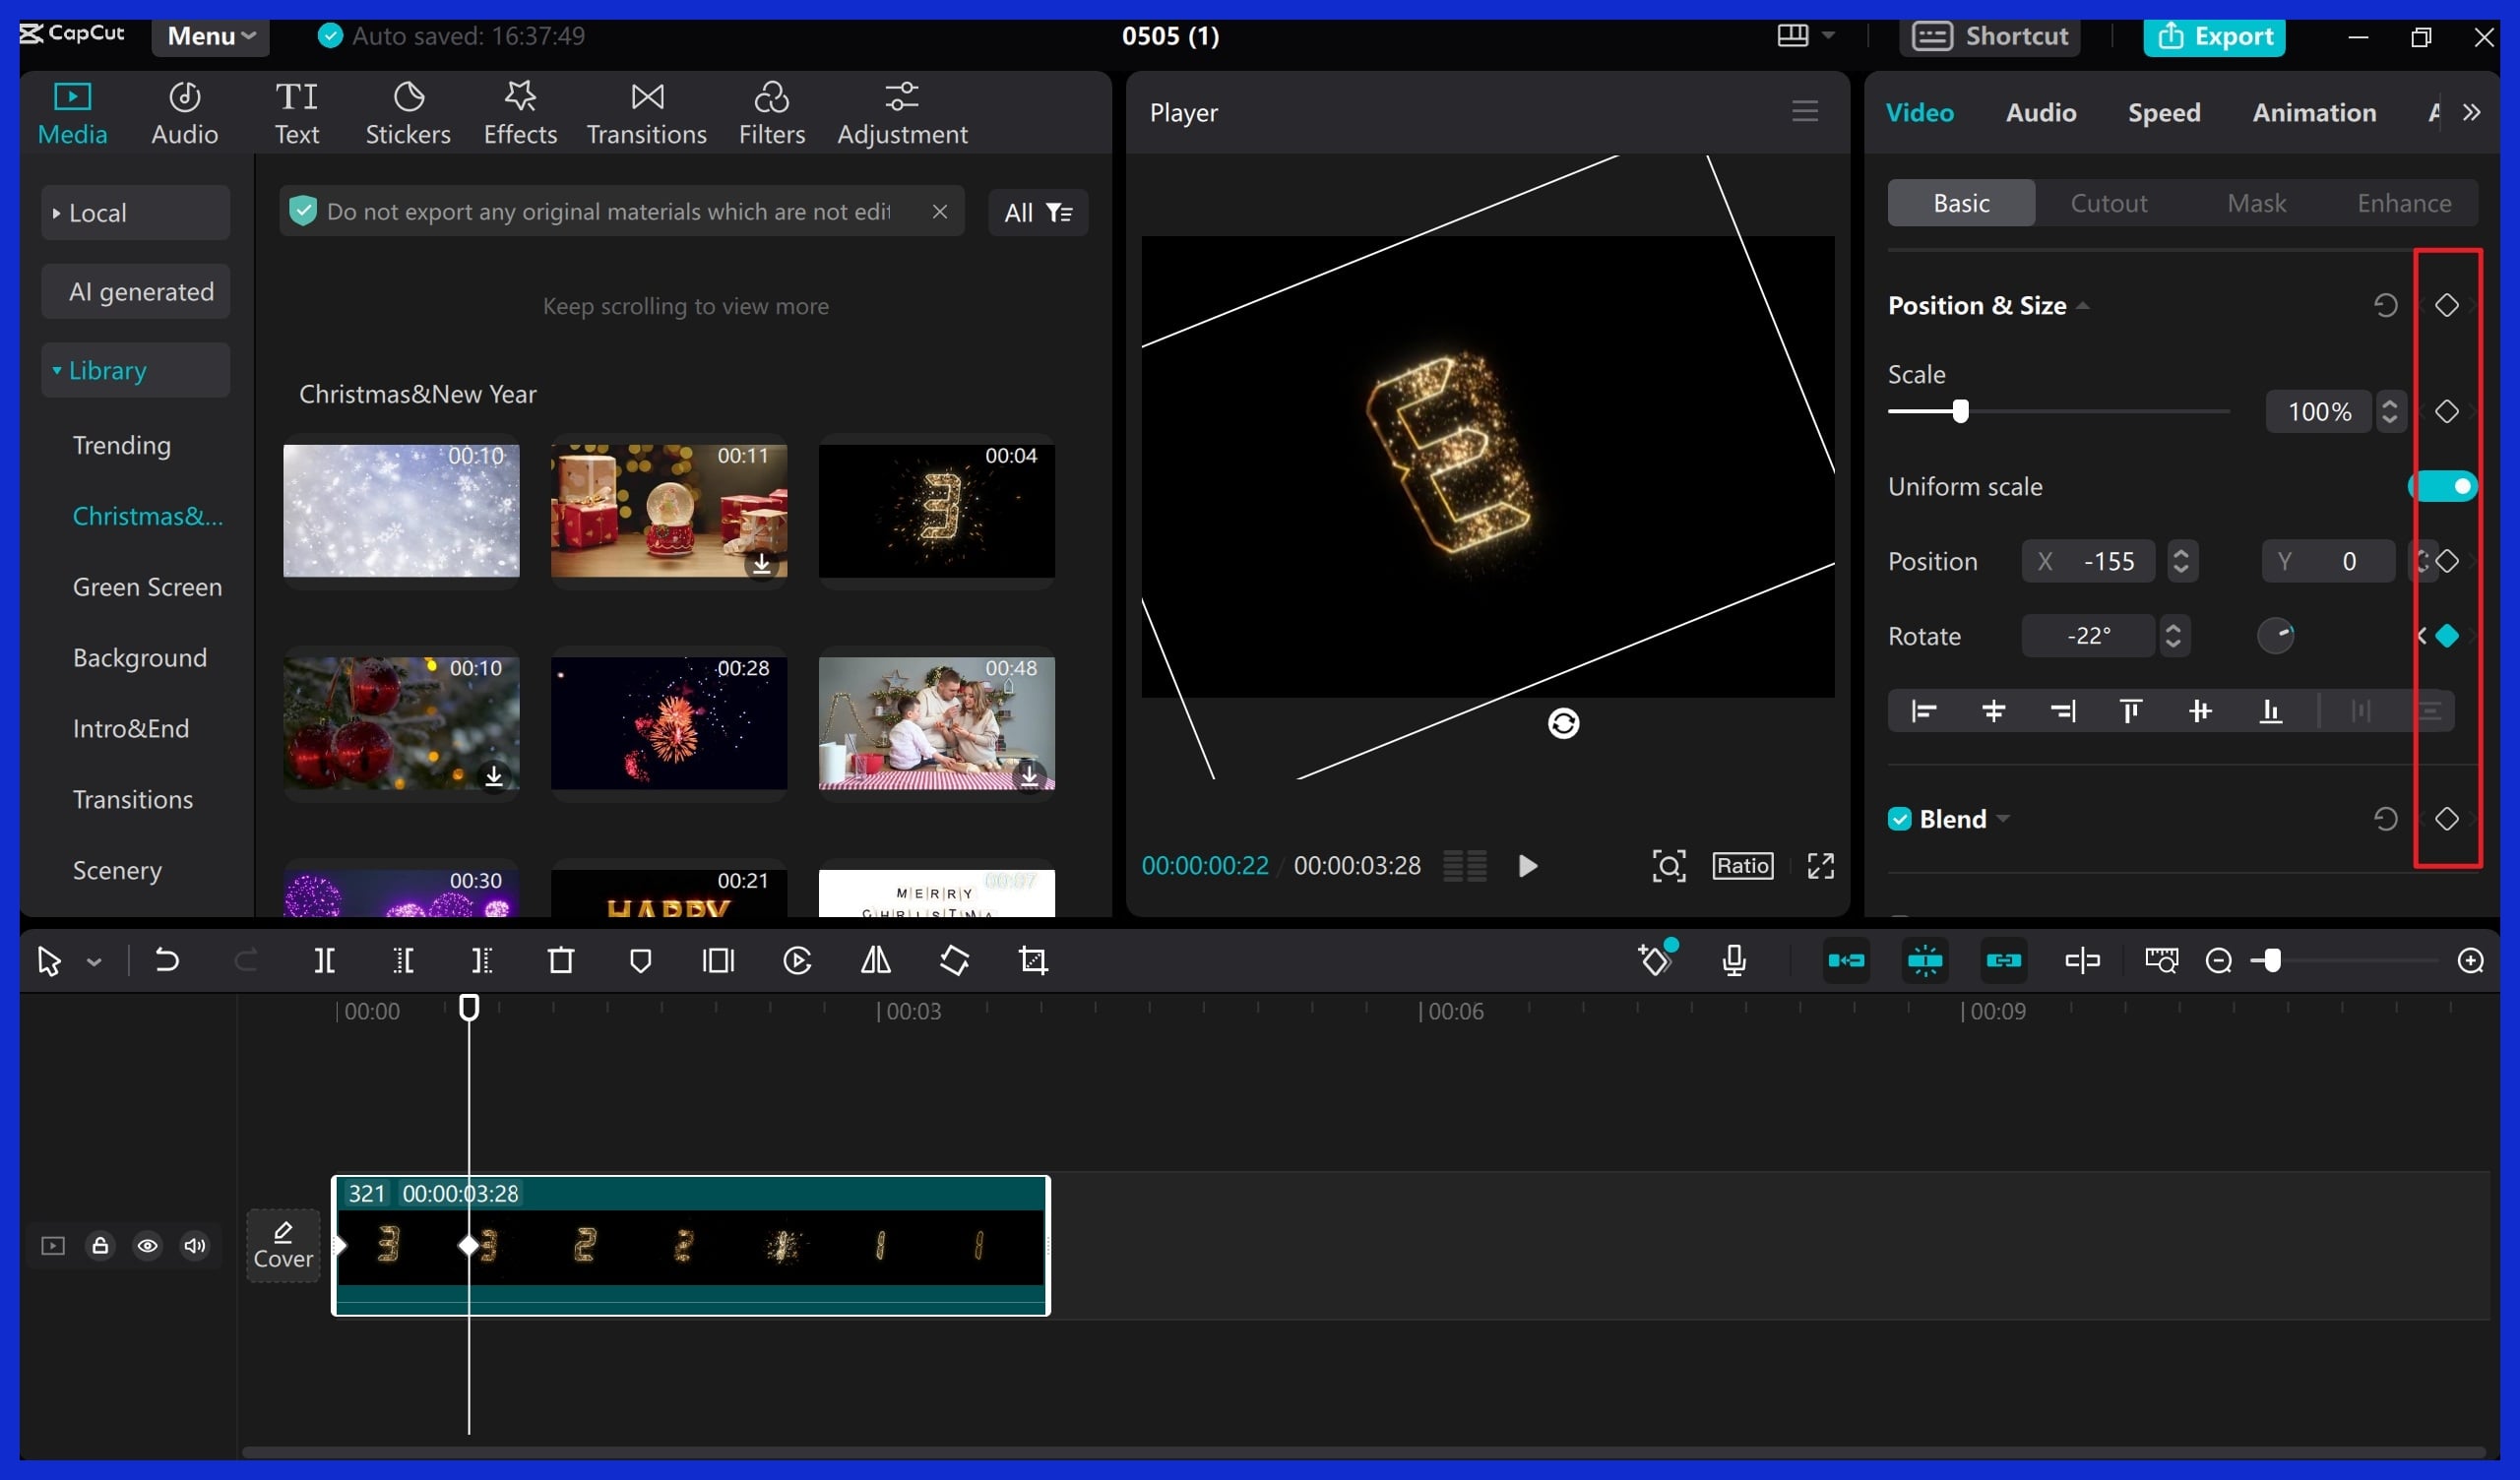
Keyframes allow for precise movement of elements in your video. You select a start position and an end position, and CapCut will travel the object between them. It’s excellent for sliding in text or bouncing graphics.
To make the action more fluid, space out your keyframes and adjust the timing. You can play with more than just where things are; try changing size or spinning graphics to add a playful touch.
Color Grading
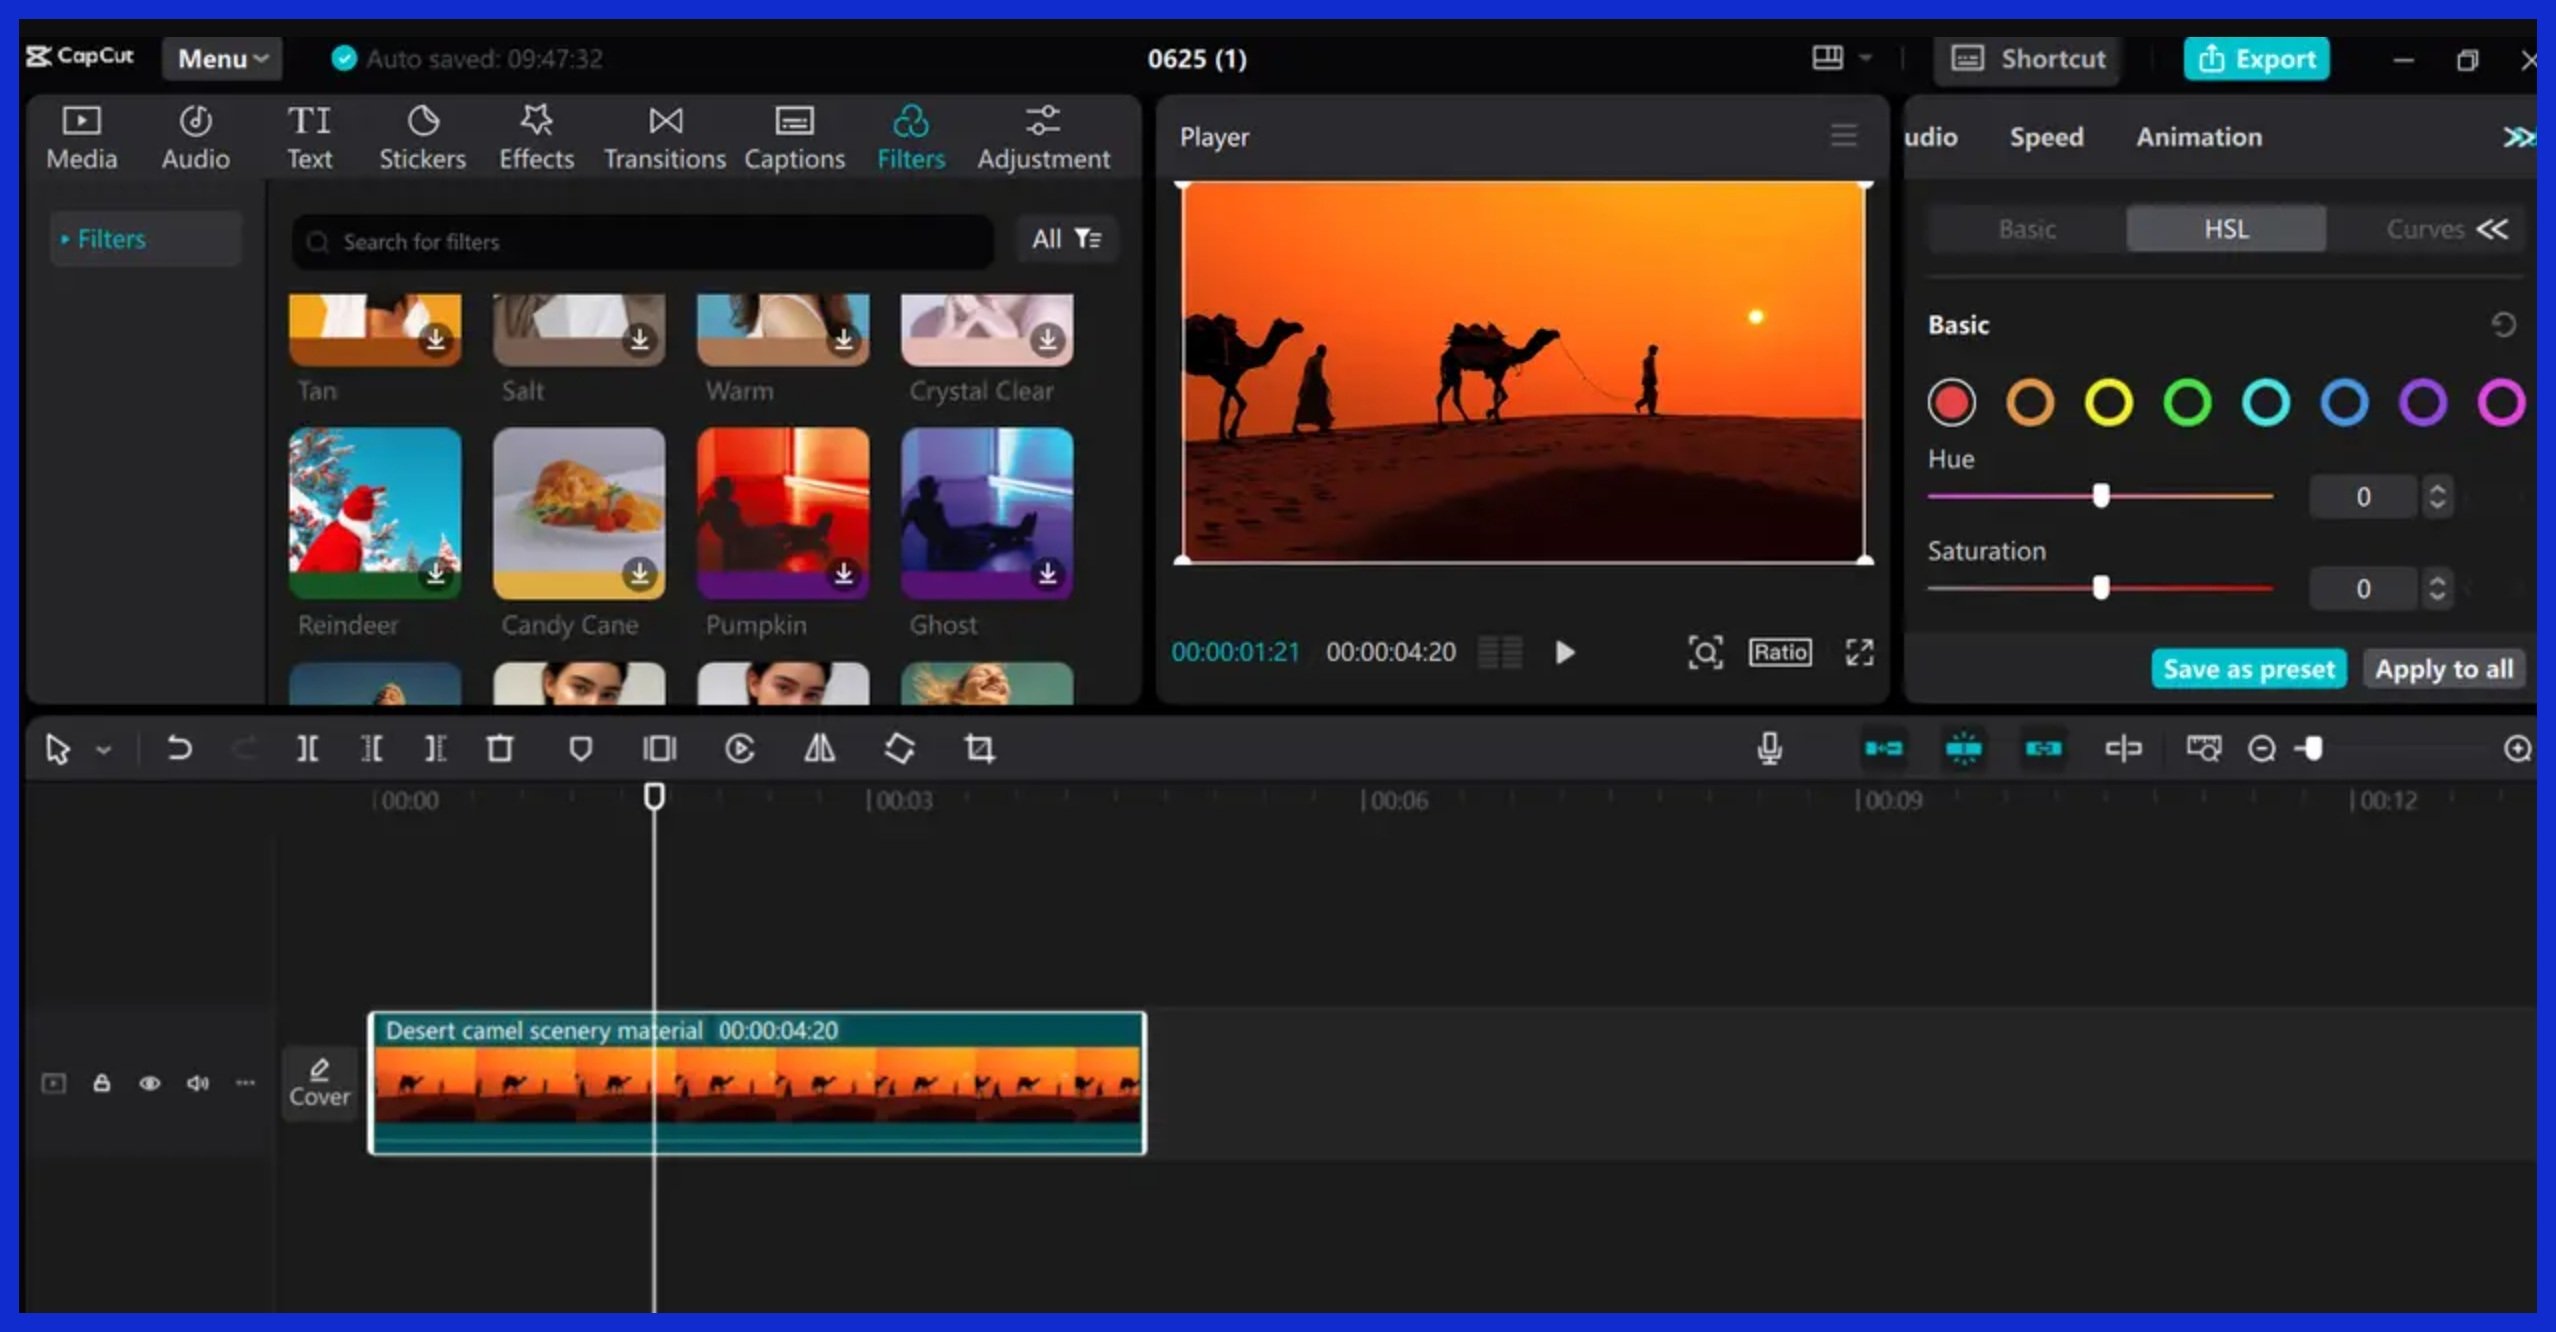
Altering the color and lighting of your video can help establish the tone. Minor brightness, contrast, and saturation tweaks can make scenes pop. Filters can bathe your entire video in a look, like a warm sunset glow or cool blue night.
Holding your color shifts consistent throughout all your clips keeps everything flowing like a single narrative. It can take time to nail, but the production value boost is frequently worth it.
Creative Overlays
Overlay photos, icons, or graphics onto your video to clarify points or add flair. Overlays are most effective if you have them fade in or out and position them so they don’t obscure the action.
You can use them to emphasize important information or create amusing annotations. Experiment by combining various overlay types, such as animated stickers, lower thirds, or soft textures, to complement your video’s tone.
Audio Mixing
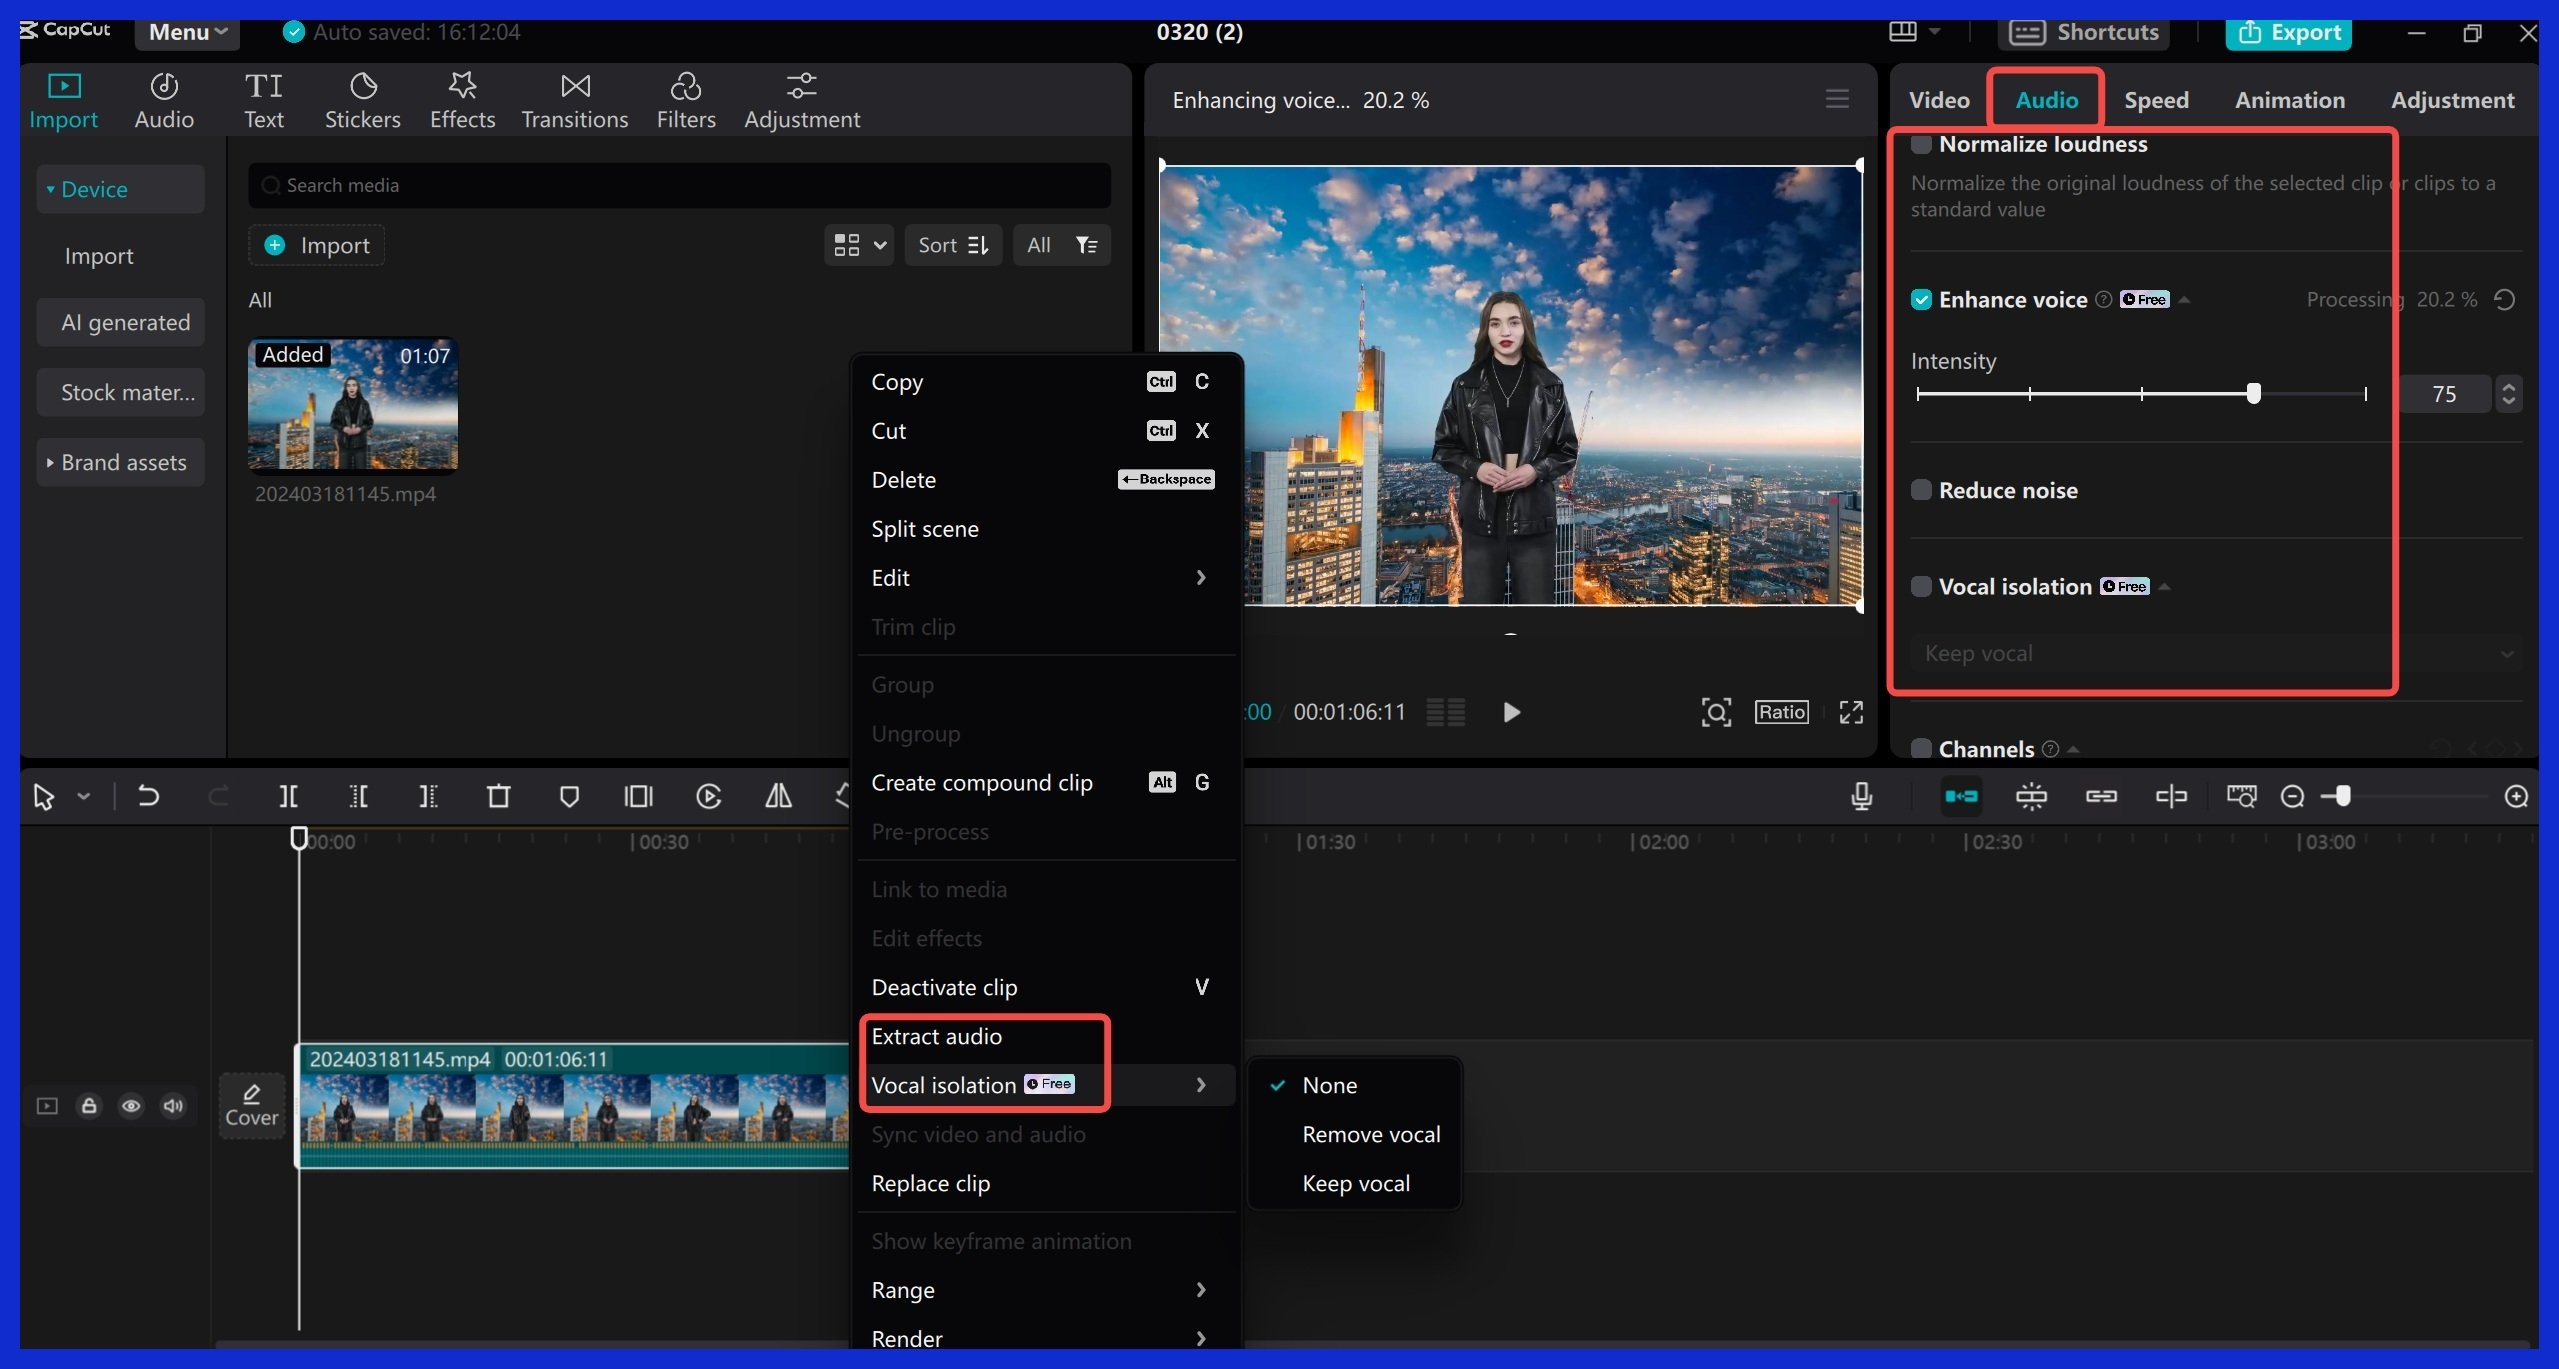
Let strong sound make your video sparkle. Stack background music, voice, and sound effects, but drop other tracks to keep the main voice clear.
Have fun with reverb effects for a big room ambiance or EQ settings to cut through muddy recording. Always listen back to catch any sounds that are too loud or too soft.
Good audio, coupled with crisp visuals, is what makes a video feel complete.
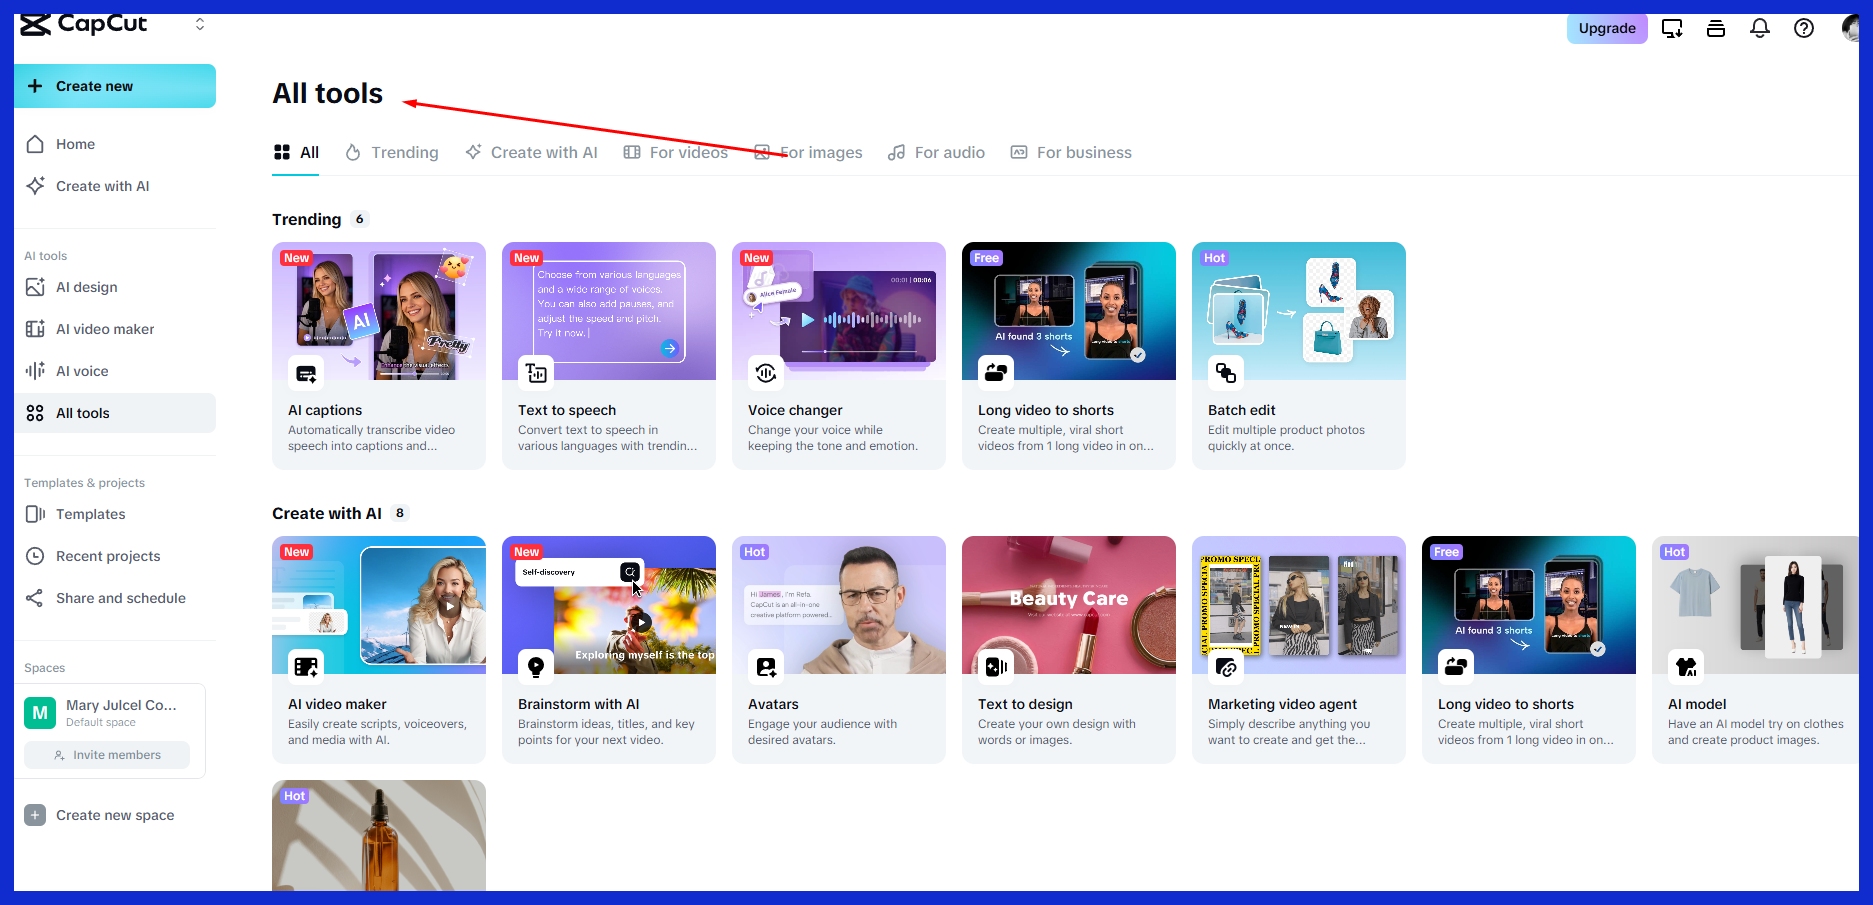
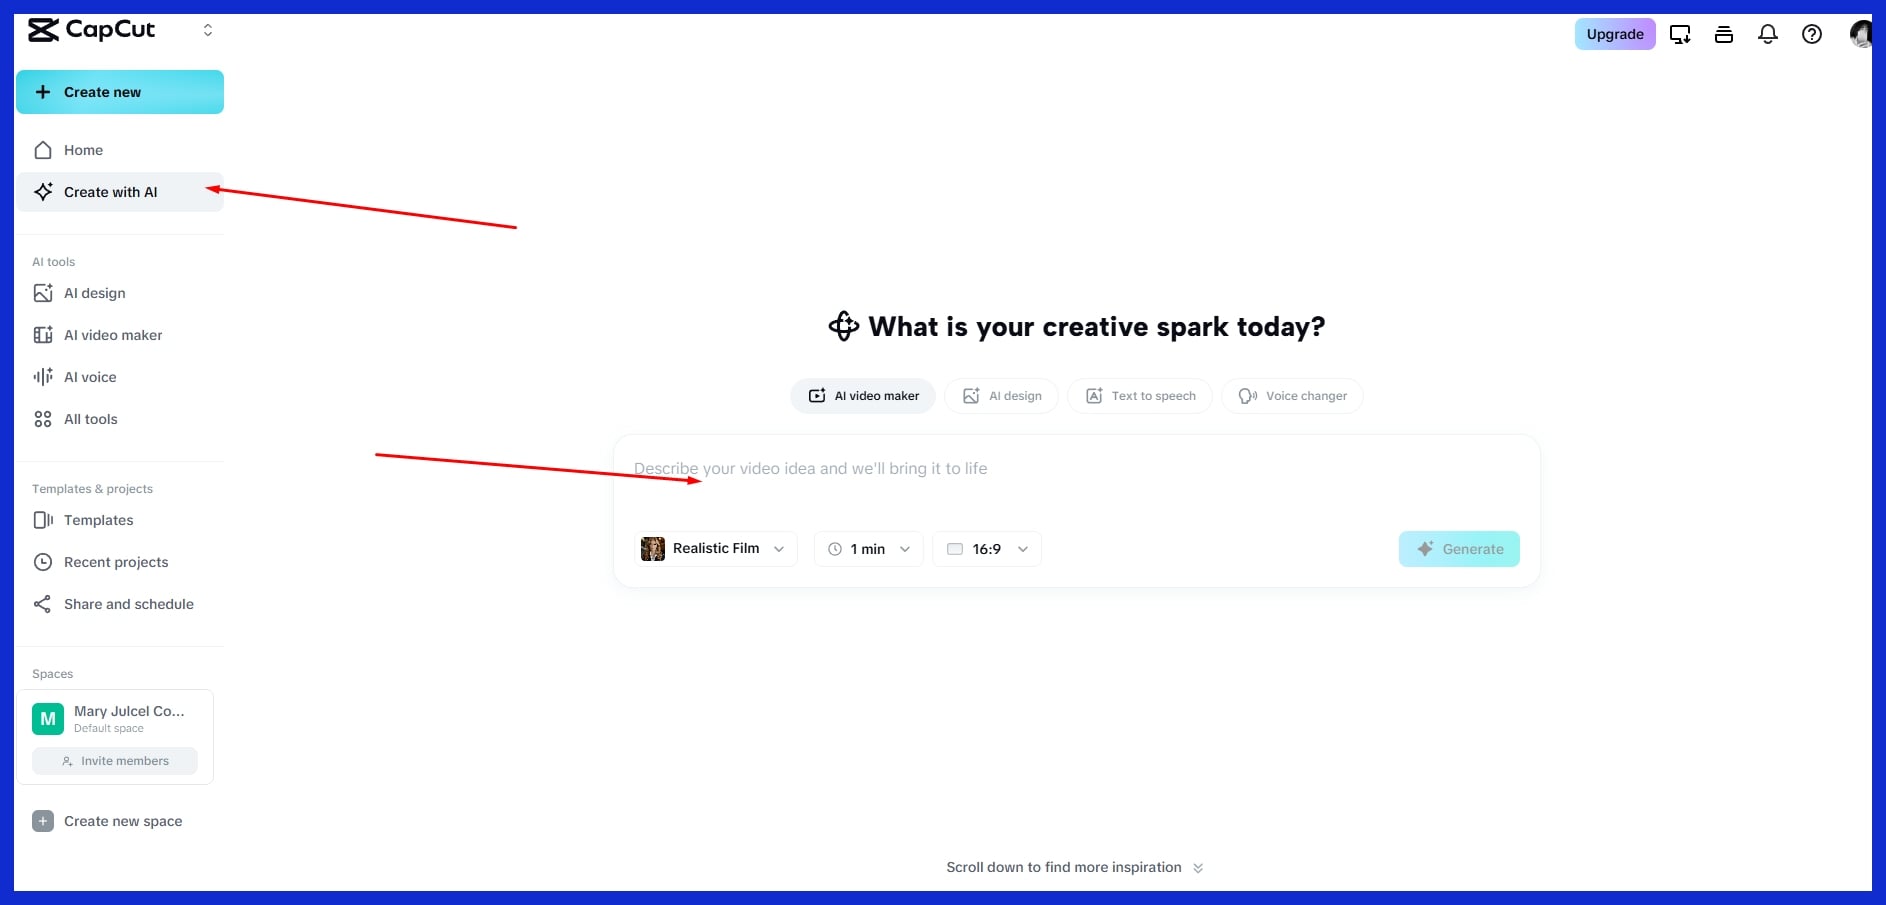
Harnessing CapCut’s AI Magic
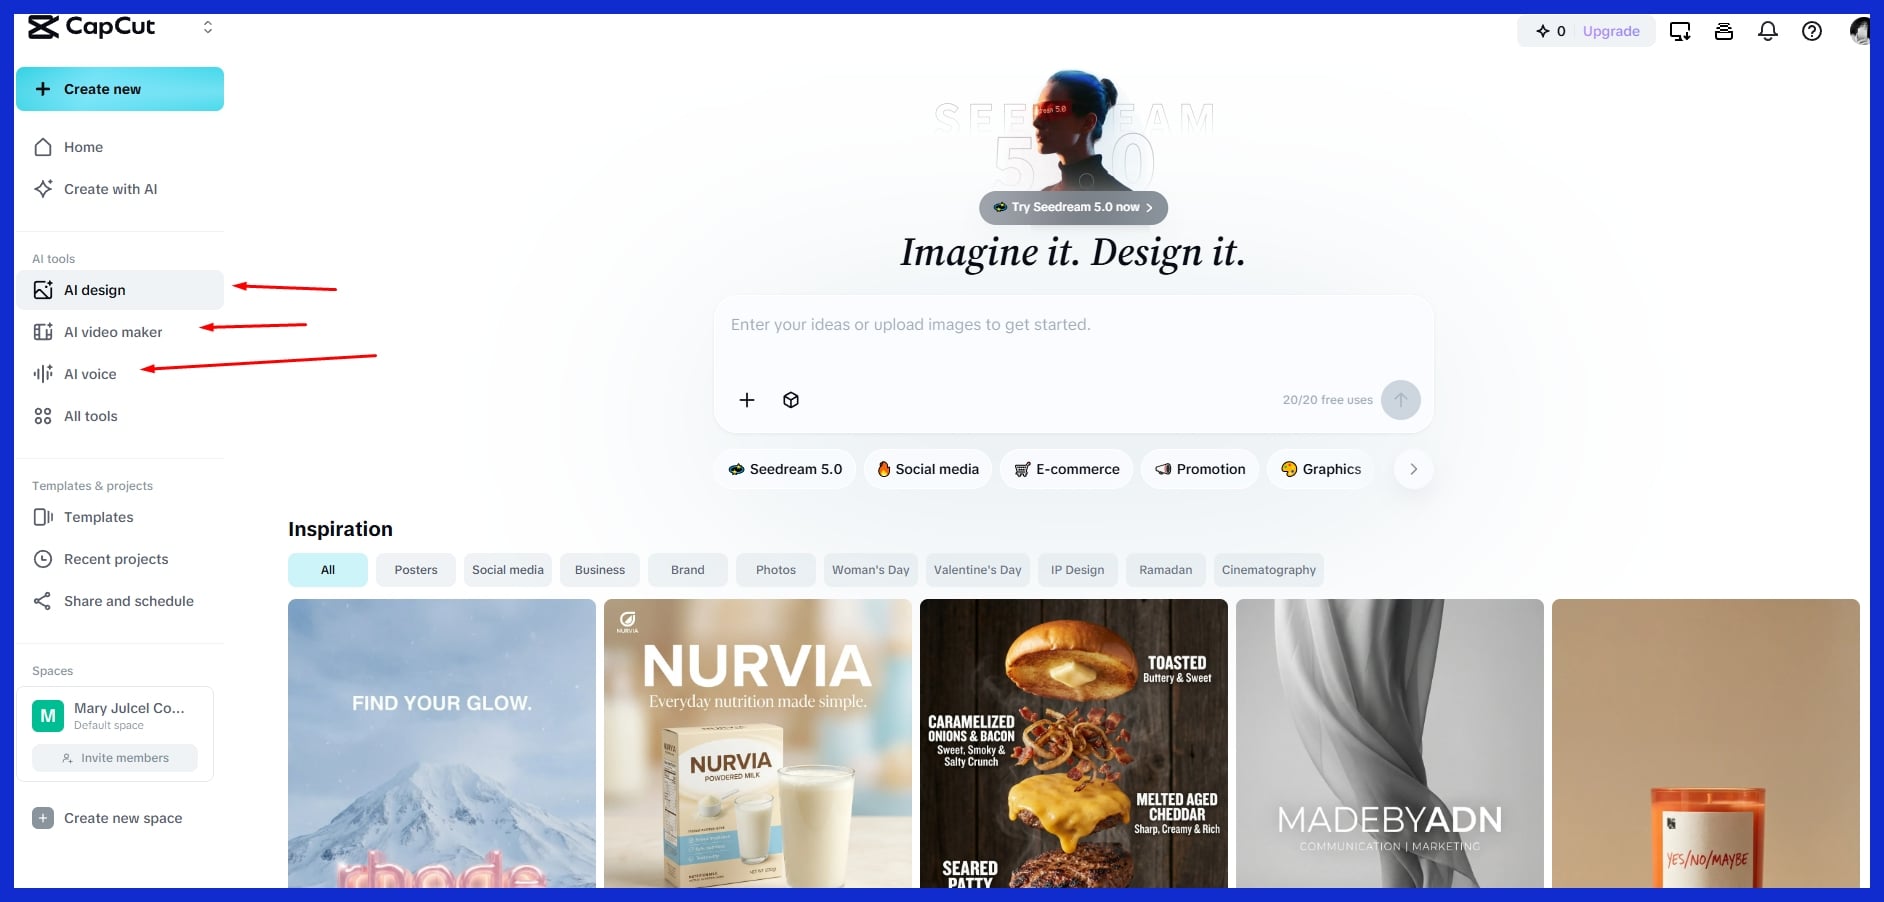
CapCut serves up smart tools, putting the speed and ease back in video editing. AI magic takes care of more than half of the things that used to take me hours. These tools assist creators worldwide — not only pros but tiny teams and solo entrepreneurs — pump out crisp, professional-grade content quickly.
Particularly in the short-form scramble, each minute saved is invaluable. AI-powered captioning, background tweaks, retouching — all just a few taps away. You’ll spend less time wrangling details and more time on your story. CapCut’s updates keep coming, so keeping up means never missing the latest creative edge.
Auto Captions
These handy auto captions employ AI to listen and transcribe your speech, saving you tons of time. For agencies or creators with international teams or clients, captions open videos to more viewers. Once the tool generates the captions, you have to scan for errors.
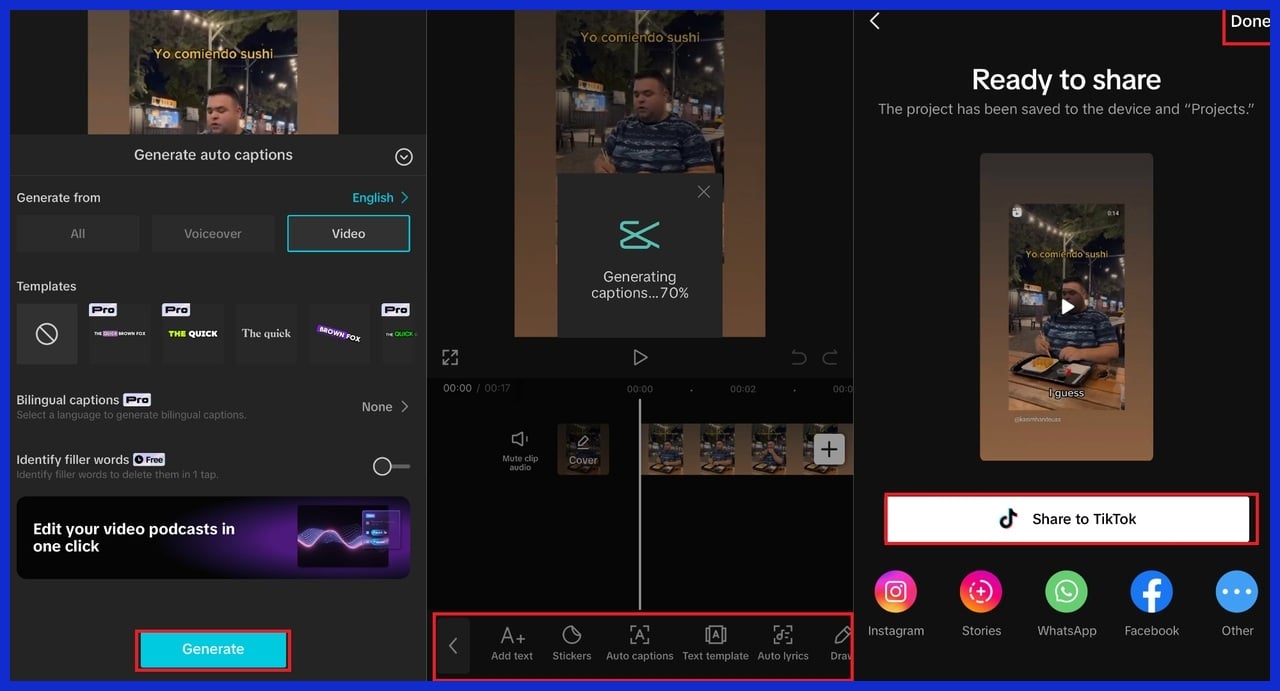
Accents or background noise can sometimes trip up the transcription. Adjust the copy for clarity and ensure the tone aligns with your brand. Customize fonts, colors, and background shapes to fit your style. This allows your captions to appear just as crisp as the rest of your video.
Adding captions increases engagement, particularly for those who watch on mute or are hard of hearing. When you get the look and precision right, people stay longer and share more. If you want to scale up caption-heavy content without extra hands, a team like Graphically.io can add magic by keeping quality safe at every turn.
Background Removal
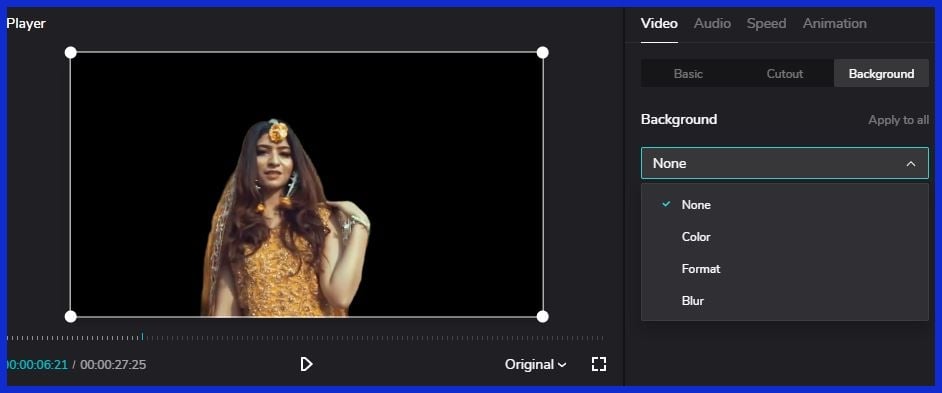
Use high-contrast footage. Make sure subjects are well-lit and not blending into the background. Don’t expect perfect results with cluttered or low-light videos.
Use background removal to swap in new scenes or create overlays. With a clean cut, you can drop your subject into any context, which is perfect for ads, product demos, or social posts. Play with cityscapes, neon, or branded imagery for various campaigns.
Edges count. Messy outlines make a video appear hurried. Use the refine brush to tidy up any stragglers. It yields a polished, pro finish that pops online.
AI Retouching
AI retouching takes it up a notch by adjusting lighting, smoothing skin, and sharpening fuzziness. It’s sort of like a mini post-production team in your pocket, perfect for tight deadlines and quick turnaround work.
Adjust the settings to achieve your desired tone. You could opt for bright and fresh or deep and dramatic. Stack retouching with other effects like color grading or transitions for a richer aesthetic.
Real-time previews mean you view changes immediately, so you can work quickly and experiment. AI eliminates the guesswork and allows you to concentrate on the narrative you wish to convey.
Mastering Your Export Settings
Mastering your export settings in CapCut determines how your video appears and performs on any device. Nailing these means your project will fit the platform, maintain its punch and capture more eyeballs. A lot of creators are intimidated by this step initially; the time invested here rewards you by preventing headaches down the line.
Selecting the optimal combination of resolution, frame rate and codec can feel like a labyrinth, but it’s worthwhile. It distinguishes amateur uploads from sleek, professional work. Use this table as a quick reference for optimal settings:
|
Platform |
Resolution |
Frame Rate |
Codec |
|---|---|---|---|
|
YouTube |
1920×1080p |
30 or 60 fps |
MP4/H.264 |
|
Instagram Feed |
1080×1080p |
30 fps |
MP4/H.264 |
|
TikTok |
1080×1920p |
30 or 60 fps |
MP4/H.264 |
|
|
1280×720p+ |
30 fps |
MP4/H.264 |
|
|
1920×1080p |
24 or 30 fps |
MP4/H.264 |
Export preview. This step assists in catching problems sooner. If you frequently use the same settings, save them as a CapCut preset. It speeds future projects and keeps your workflow humming just like we help streamline creative work for our customers at Graphically.io.
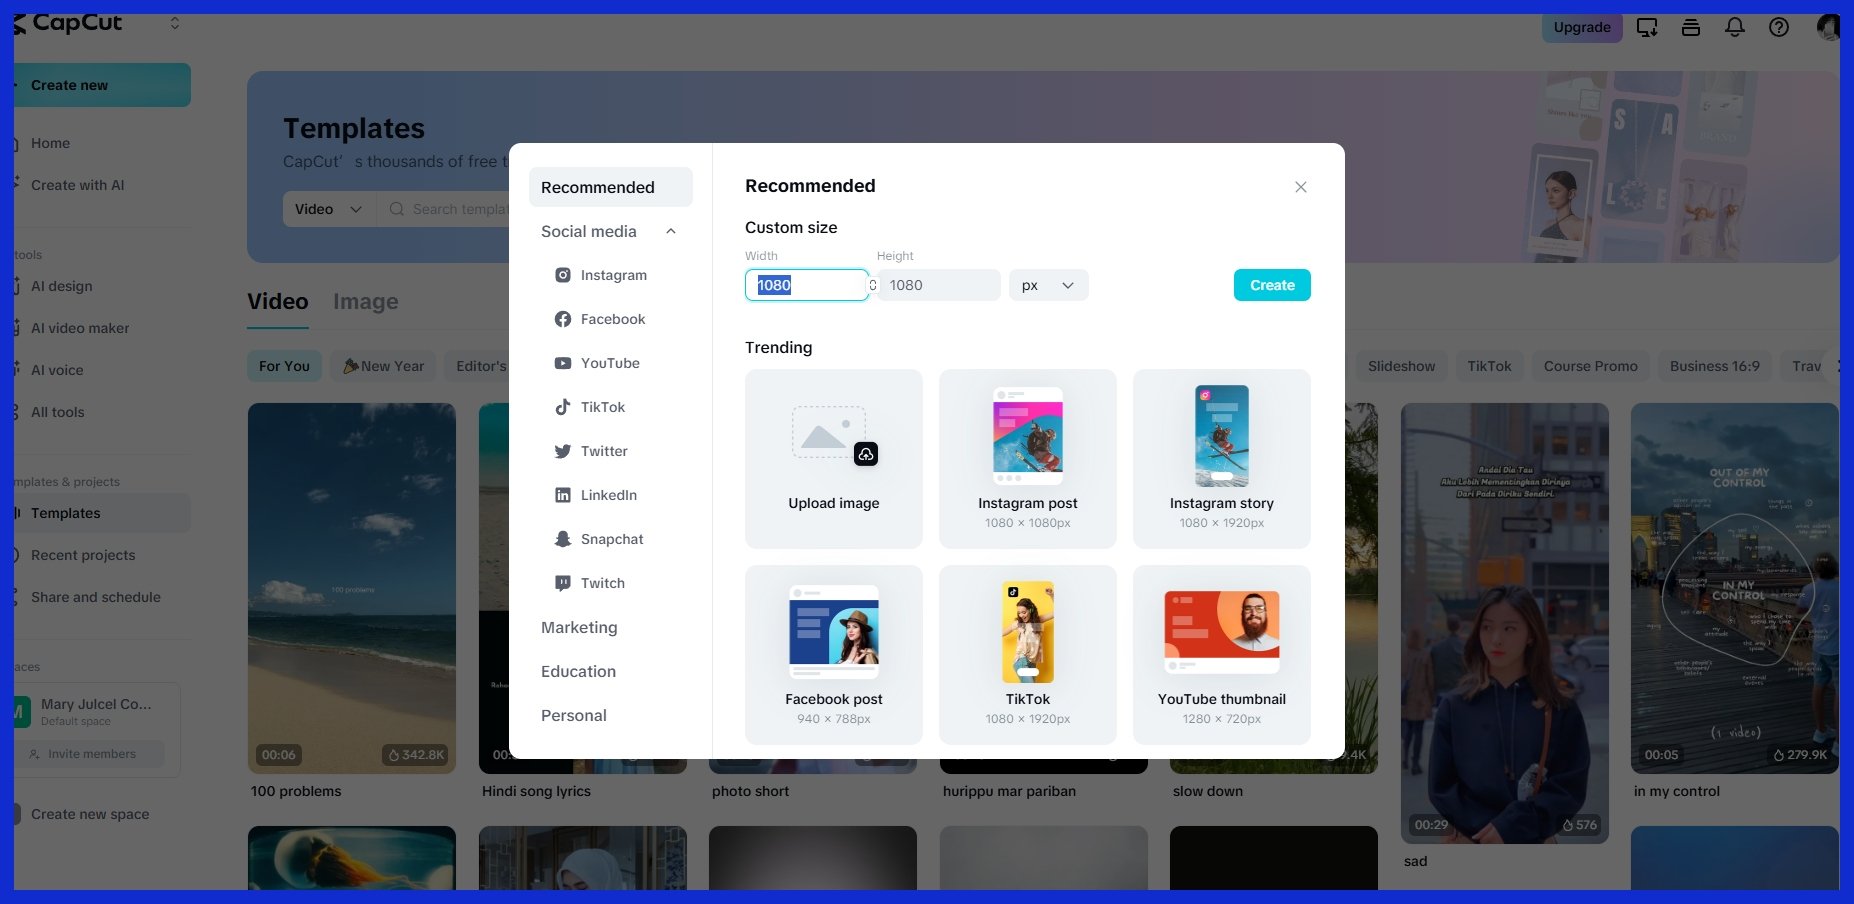
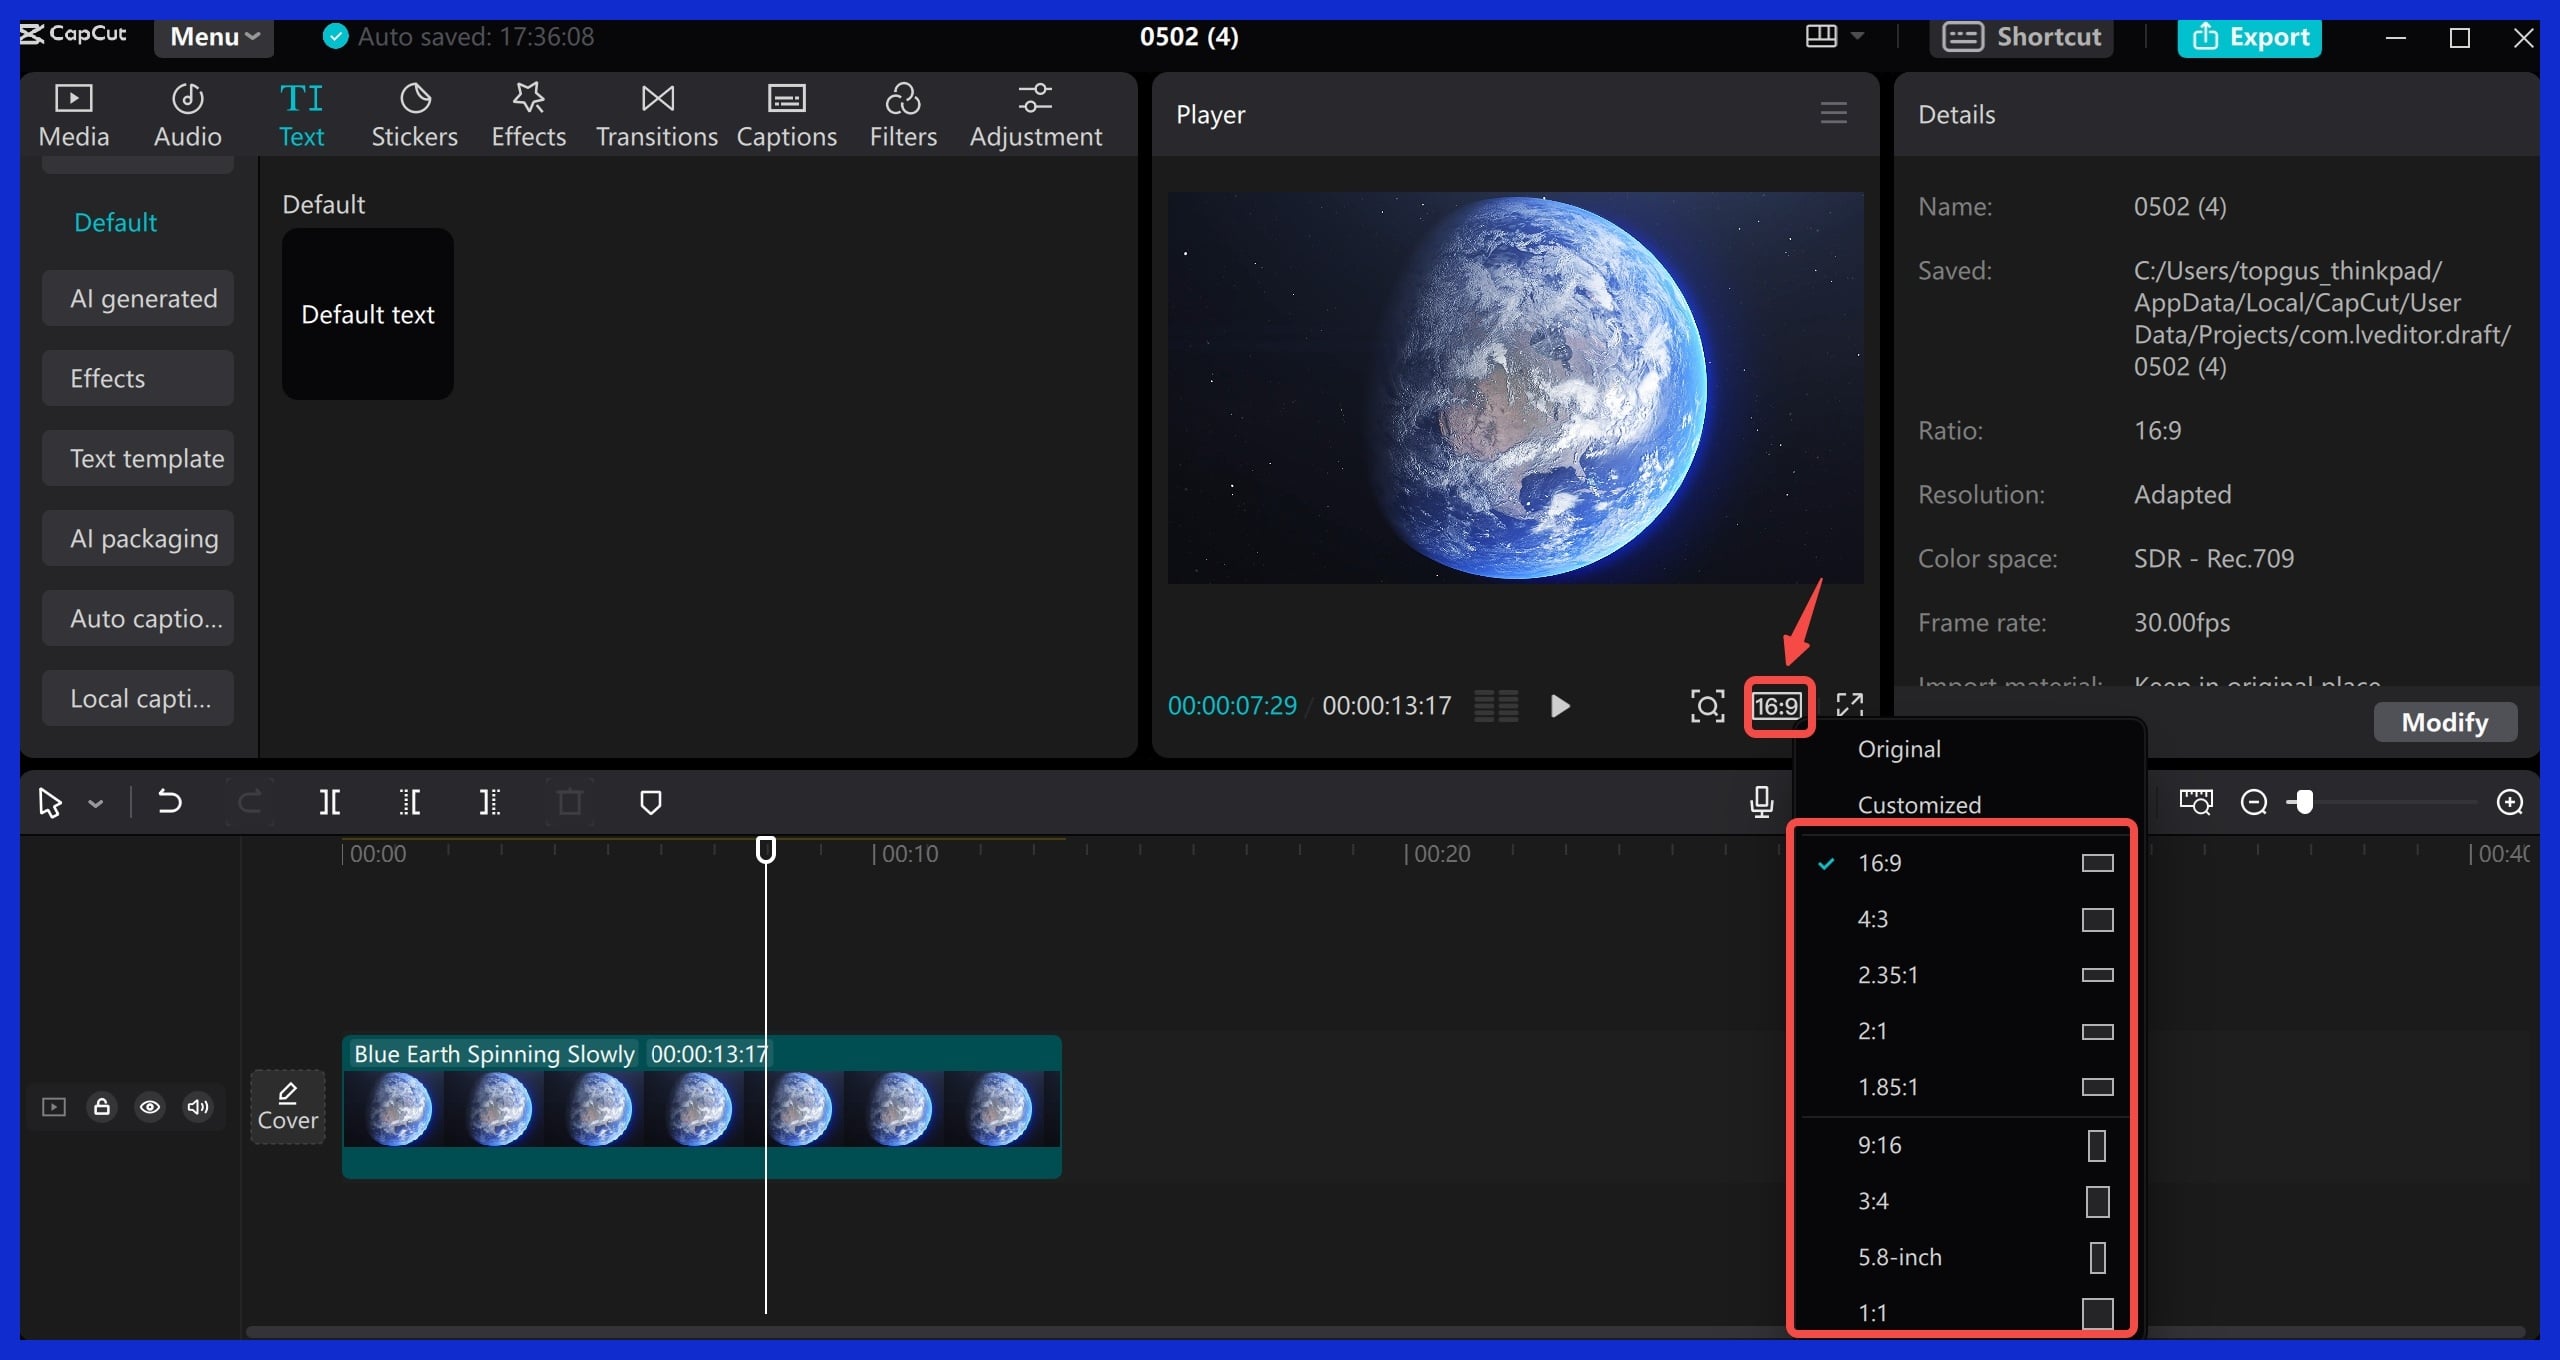
Resolution
Resolution is the foundation of your video’s appearance. For the majority of social media, 1080p is the sweet spot. It’s crisp, loads on just about any device, and keeps file sizes reasonable. If you’re editing for a big campaign or need to wow folks on large screens, step up to 4K.
Just realize higher resolutions signify bigger files and longer upload times. Other times, platforms desire square or vertical videos. For instance, Instagram likes 1080 by 1080 pixels and TikTok is all about 1080 by 1920 pixels. Just be sure to check what is best for wherever you will post it.
If you are not certain, export a small segment at various resolutions. View it on your phone and laptop. Choose what looks nice, loads quickly, and suits your platform requirements.
Frame Rate
Frame rate controls how fluid your video appears. Most web videos play at 30 fps. Action-packed content, such as sports clips or product demos, can pop more at 60 fps. If you want a cinematic feel, go with 24 fps. Verify what your viewers anticipate.
Always check the platform’s frame rate rules. If you post a 60 fps video on a service that plays at 30 fps, it might look funny or stutter. Play with a few frame rates on your footage. Sometimes a slower or faster pace flips the entire mood.
Codec Choice
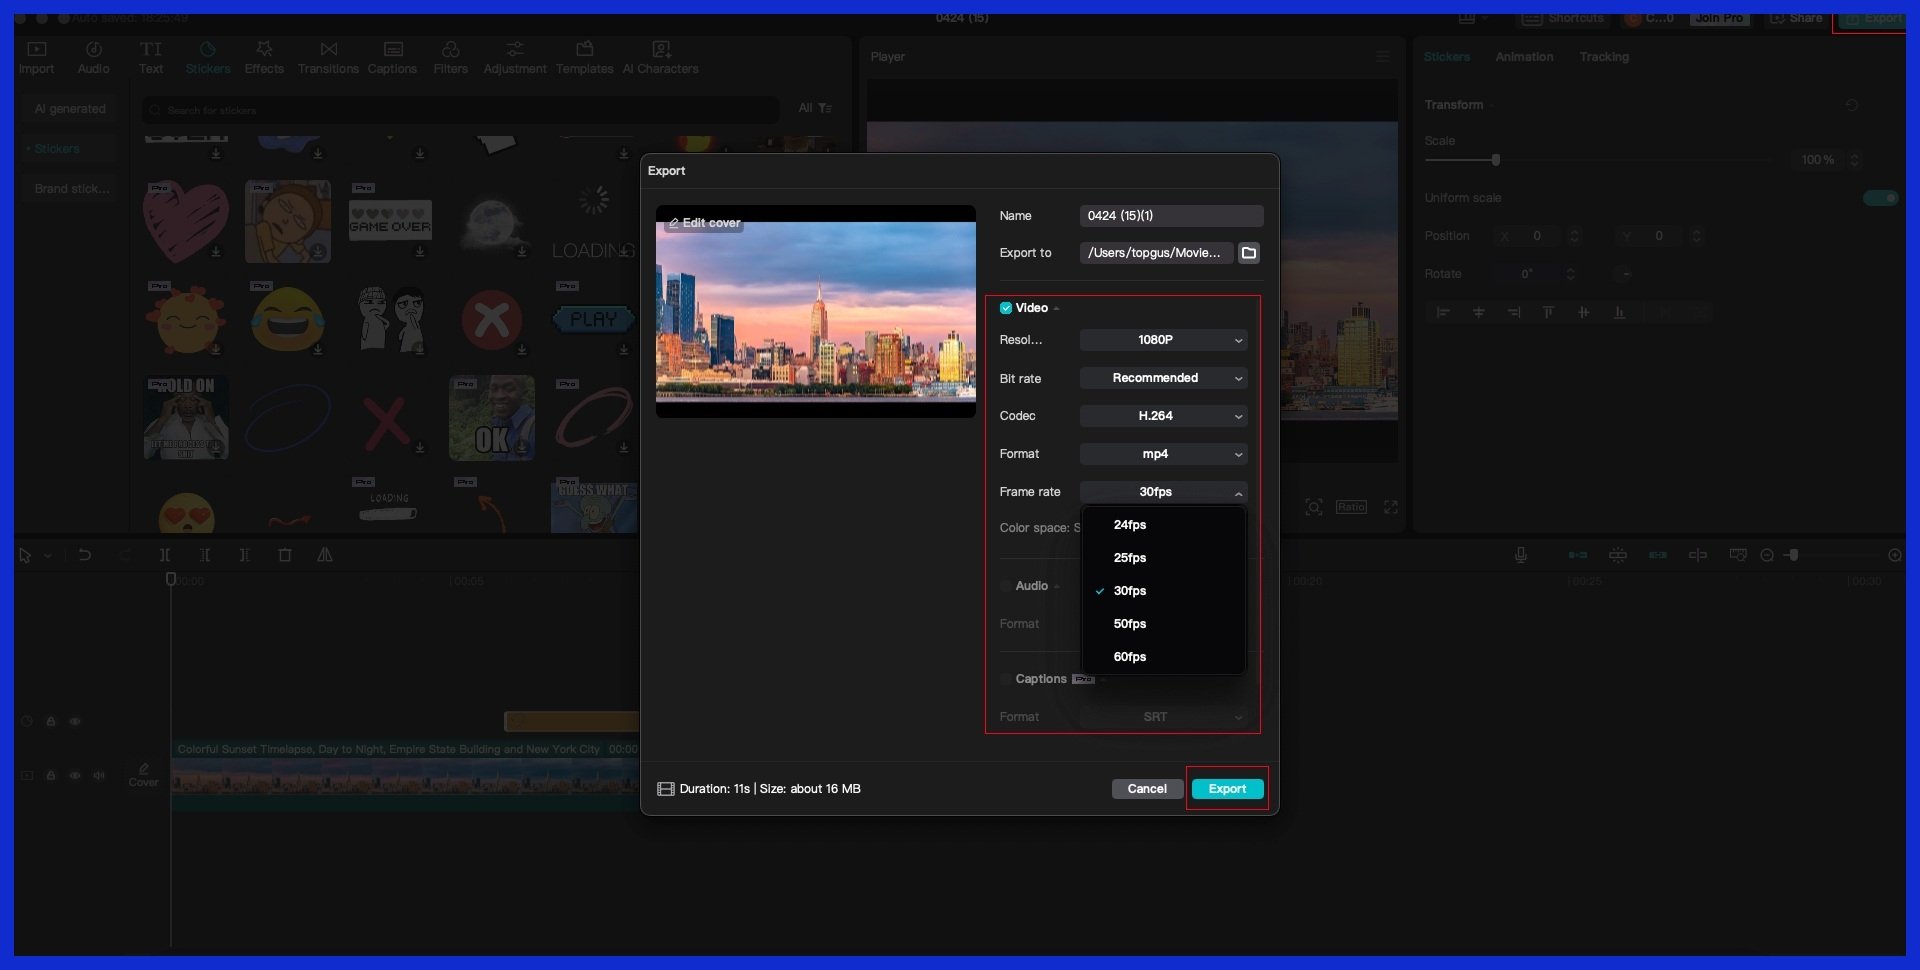
Codec decides how your video gets compressed and viewed. MP4 with H.264 is the sure-fire option for most platforms because it strikes a great balance between quality and size. MOV is another option, but it’s not as device-friendly.
Export a quick sample in both MP4 and MOV. Listen to them on your phone, tablet, and desktop. Stick with what’s best for your viewers. If you’re sharing a lot or collaborating with a team, stick to formats that are simple to upload, download, and edit.
Conclusion
CapCut keeps it simple. From raw clips to sharp, scroll-stopping videos, anyone can start. Drag, trim, add words, and tunes quickly for a sleek and enjoyable experience. Both big brands and solo creators trust it to showcase their style. I once edited a birthday vlog in 30 minutes and it still got laughs and likes. The AI tools correct shaky shots and sync audio effortlessly. No fancy desk setup or 15-minute guides are necessary.
If you want to save time and still look pro, try CapCut. If you have a story or brand to display, CapCut can help you navigate through the clutter. Give it a whirl and watch how fast you improve. And if you ever need professional support to elevate your videos even further, creative services like Graphically can help bring polished, high-quality edits to your content consistently.
Frequently Asked Questions
What is CapCut and who is it for?
CapCut is a versatile video editor that caters to both beginners and professionals. This free video editing app offers impressive features, including diverse video filters and AI tools, making the editing process straightforward for anyone creating fun clips.
How do I start editing a video in CapCut?
Launch CapCut, hit ‘New Project,’ and pick your footage. As a versatile video editor, you can trim, split, and arrange clips by dragging them on the timeline, making the editing process easier for beginners.
Can I add music and text to my videos in CapCut?
Indeed, CapCut, a versatile video editor, lets you add music, sound effects, and text. Tap the ‘Audio’ or ‘Text’ icon and select or enter what you want, enhancing your editing skills and making your videos more interesting.
What advanced editing techniques does CapCut offer?
CapCut, a versatile video editor, offers transitions, filters, and speed editing features that assist beginners in creating impressive videos with artistic flourishes.
How does CapCut’s AI help improve my videos?
CapCut’s versatile video editor offers AI tools that can automatically erase backgrounds, glamorize images, create subtitles, and recommend filters, simplifying the editing process even for beginners.
What export settings should I use in CapCut?
Select export settings according to your platform when using the CapCut desktop video editor. If it’s for social media, export as MP4 with 1080p and 30 fps for impressive videos.
Yes, CapCut is hot for virals. Its versatile video editor features built-in templates, effects, and advanced tools that assist beginners in making eye-catching, shareable videos quickly.